Landscape photography heavily depends on the weather, time, and light.
Black and White fine art Architectural photography is no exception.
I certainly felt that when I captued this.
location and the condition
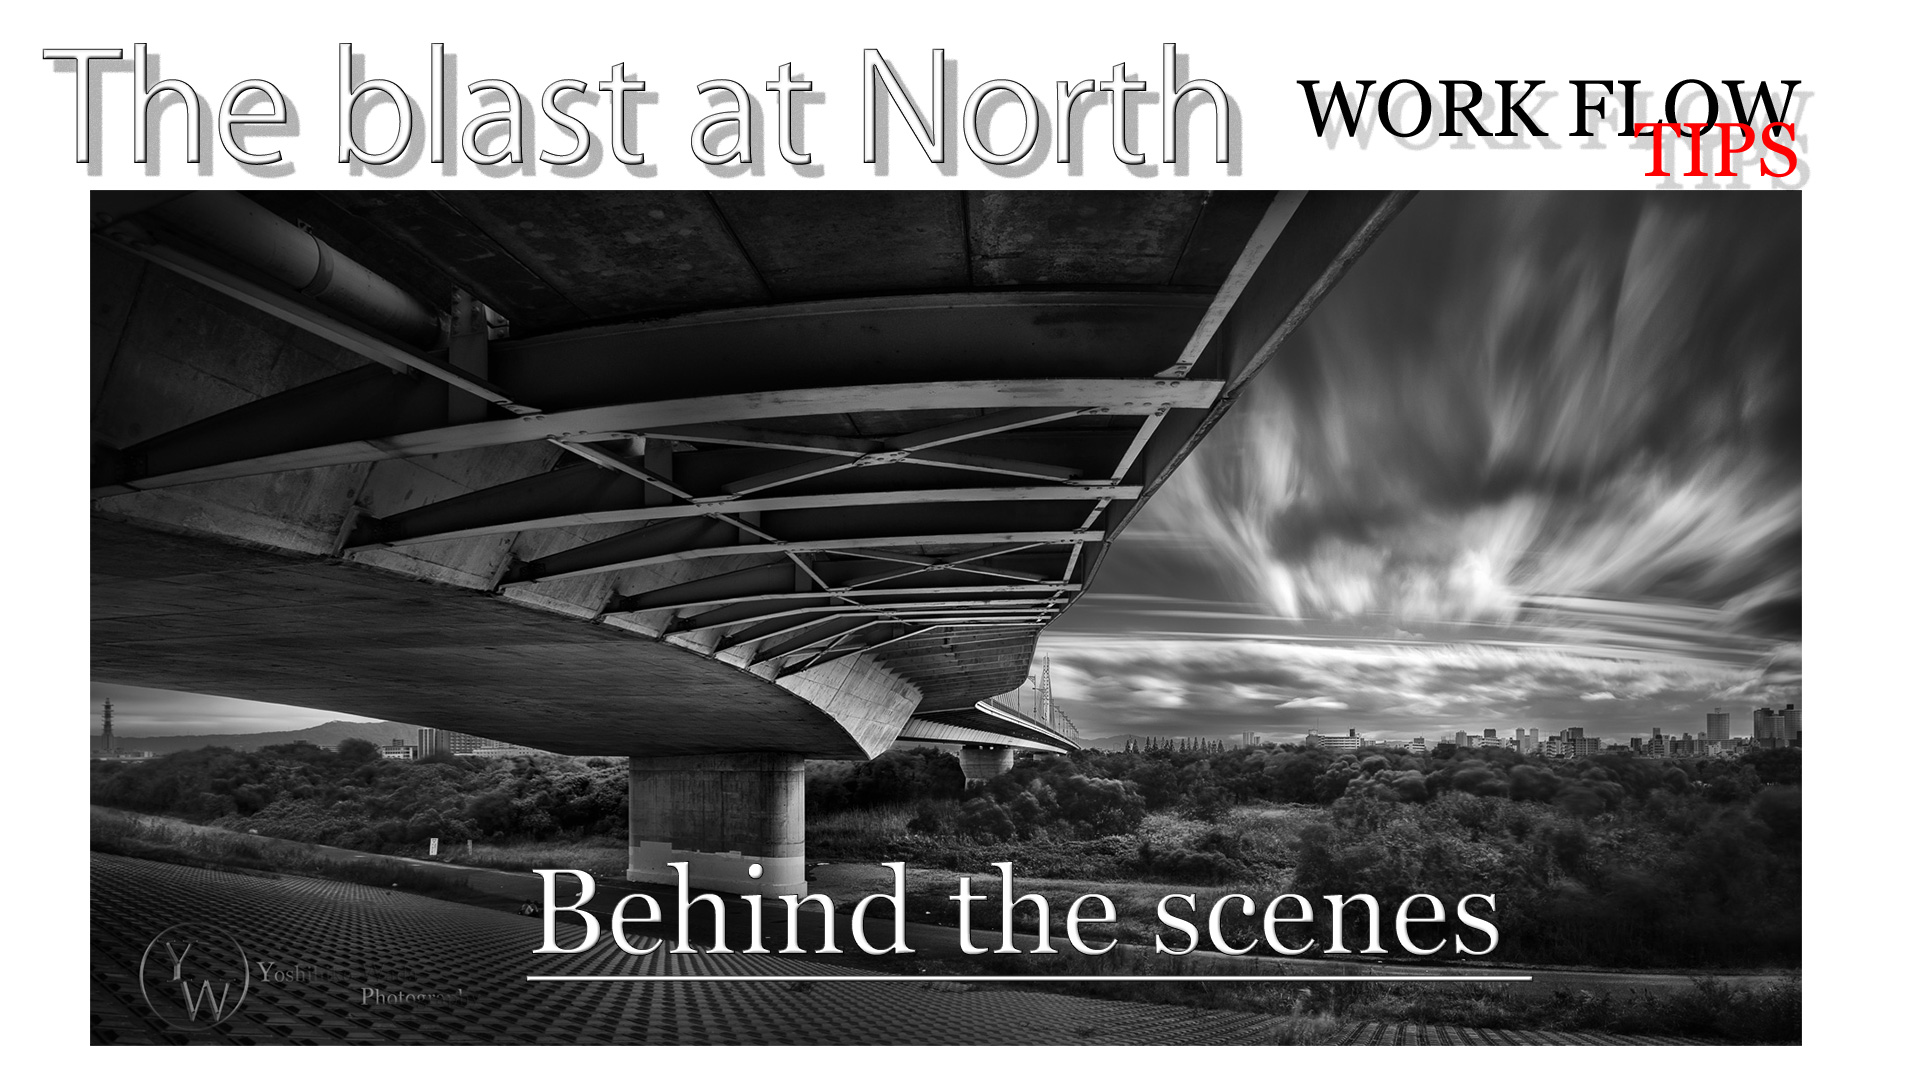
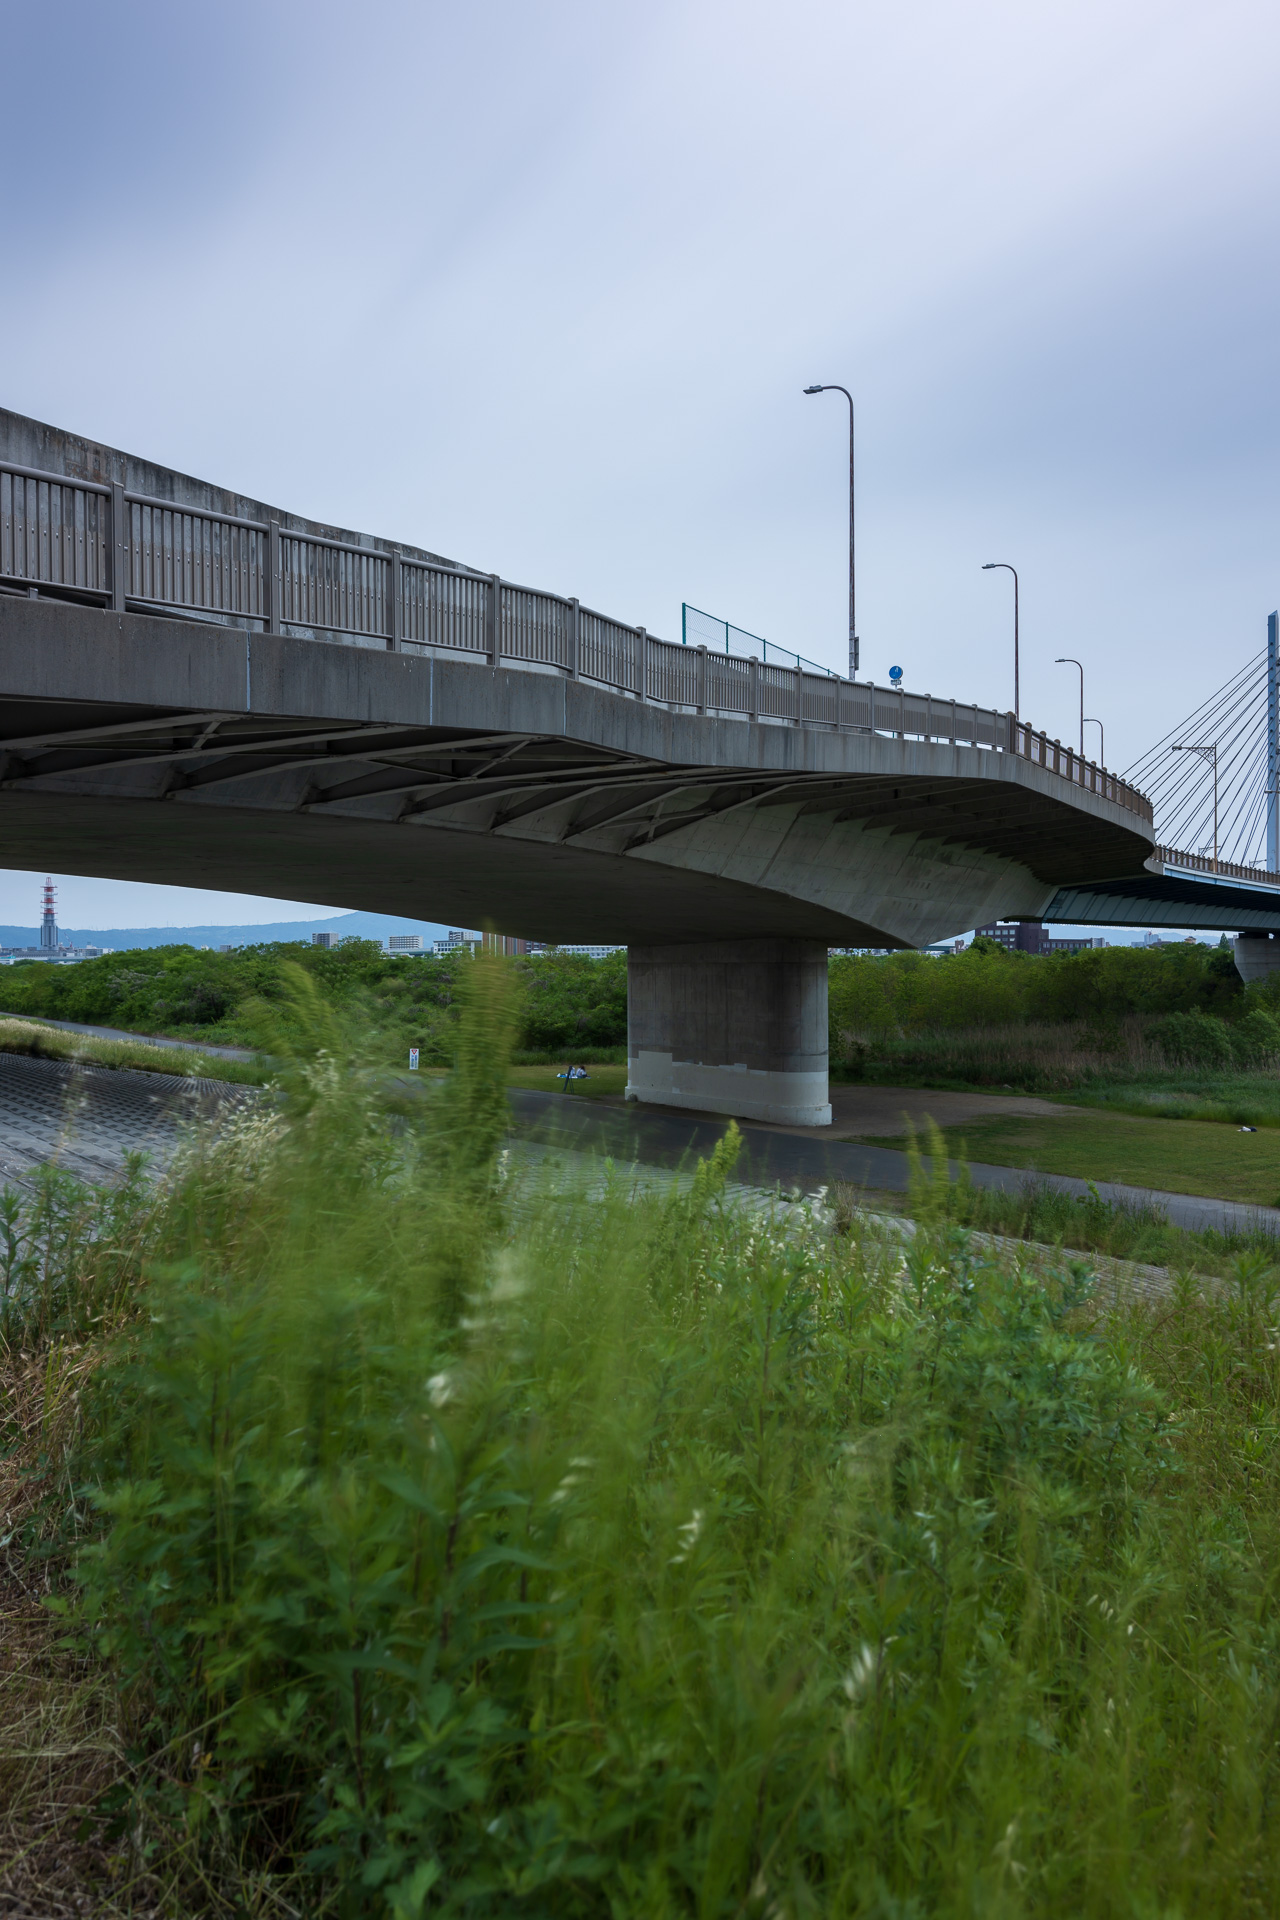
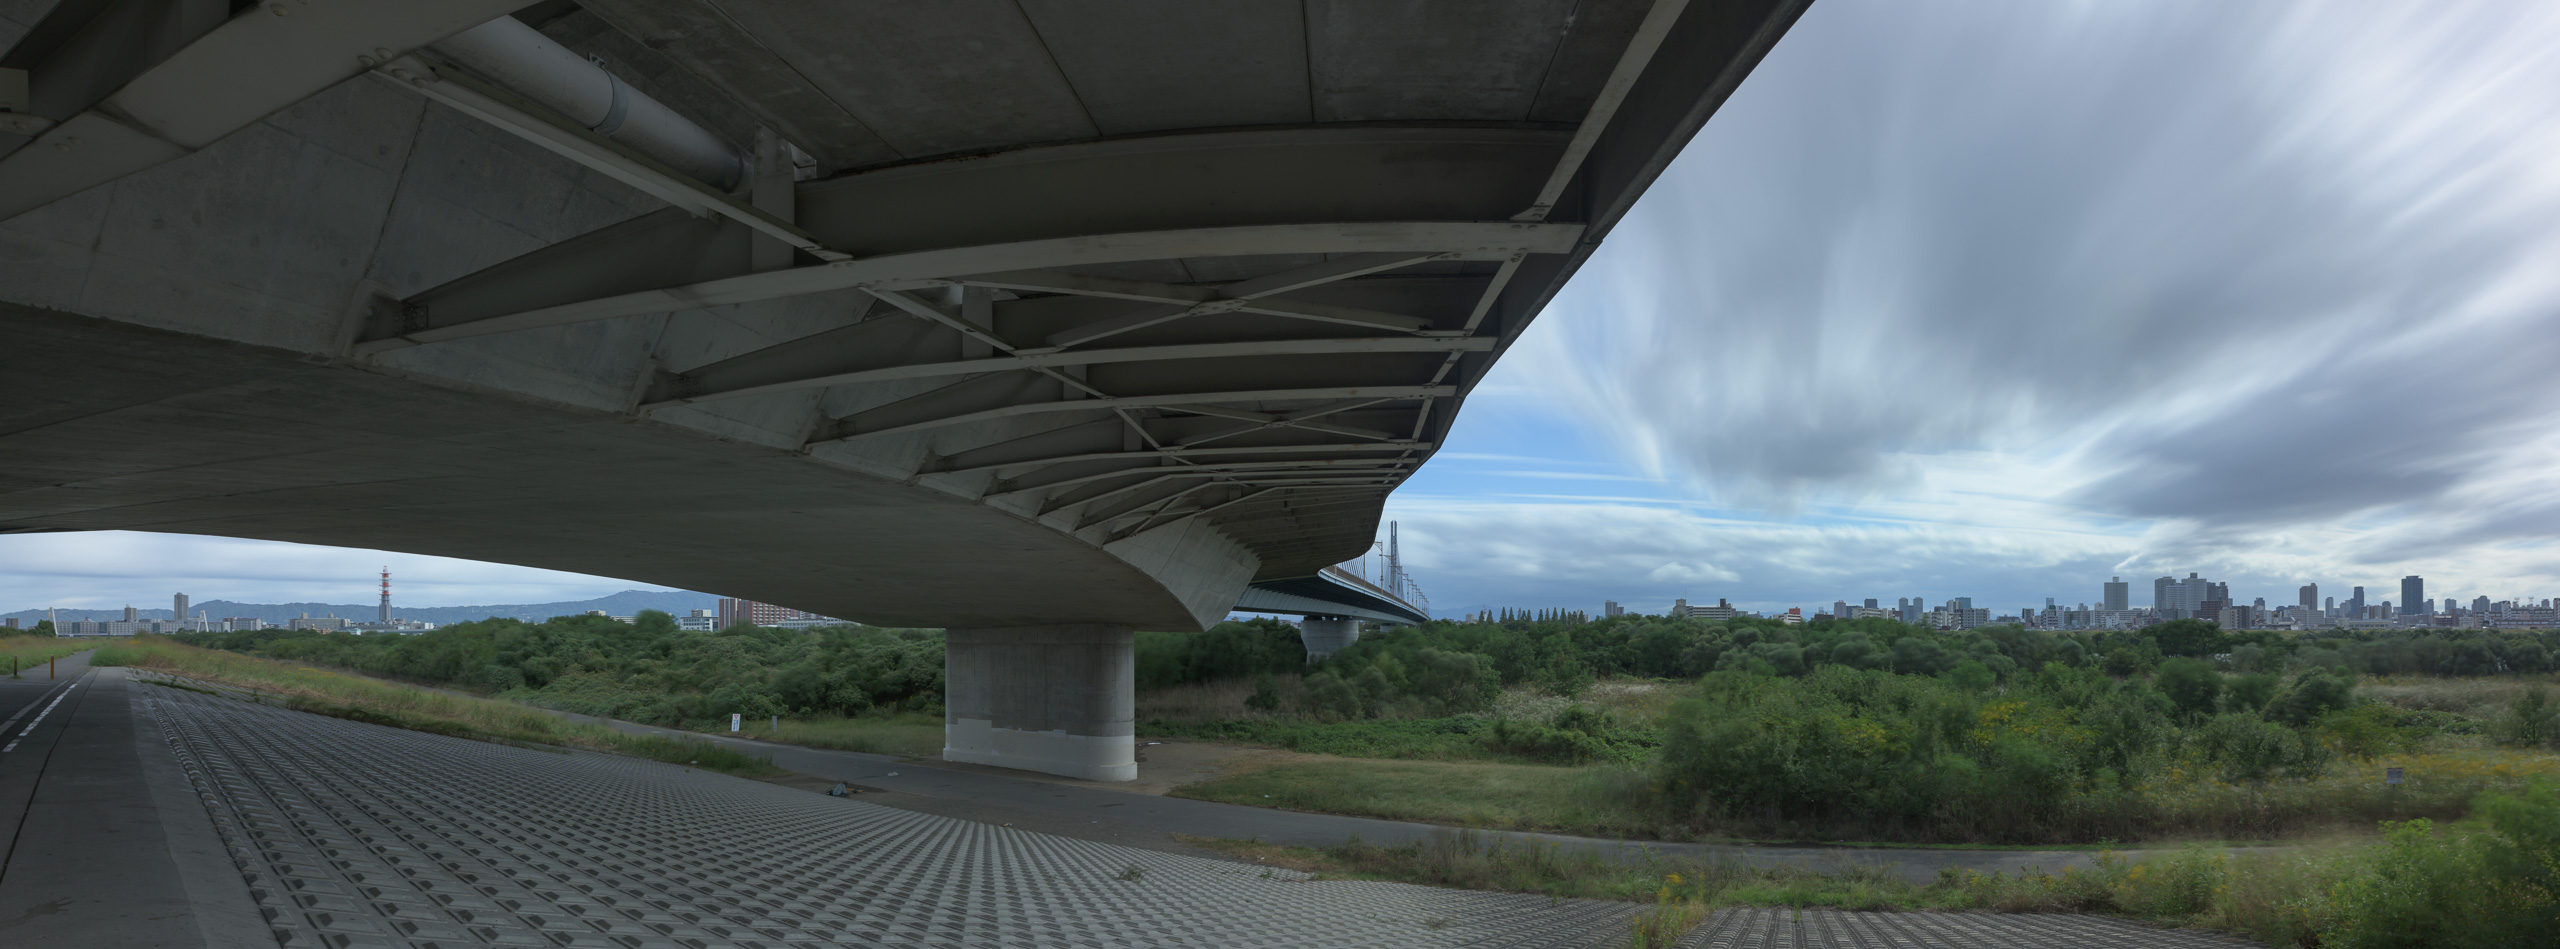
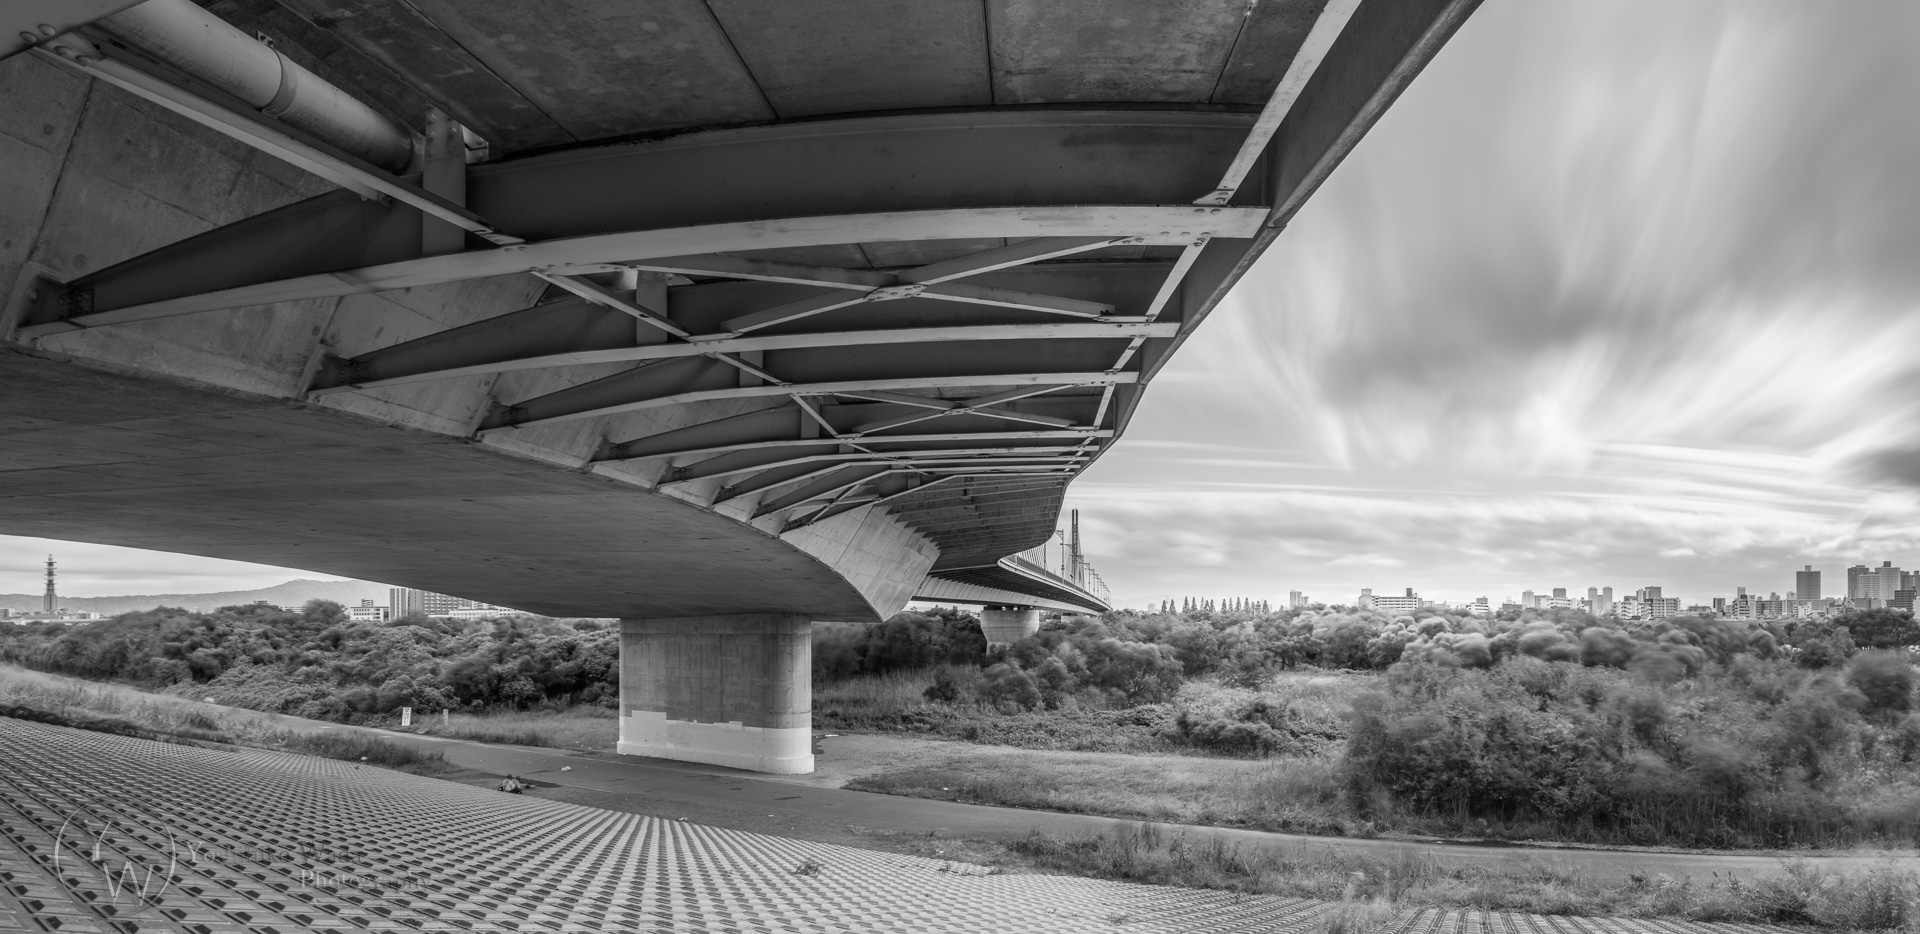
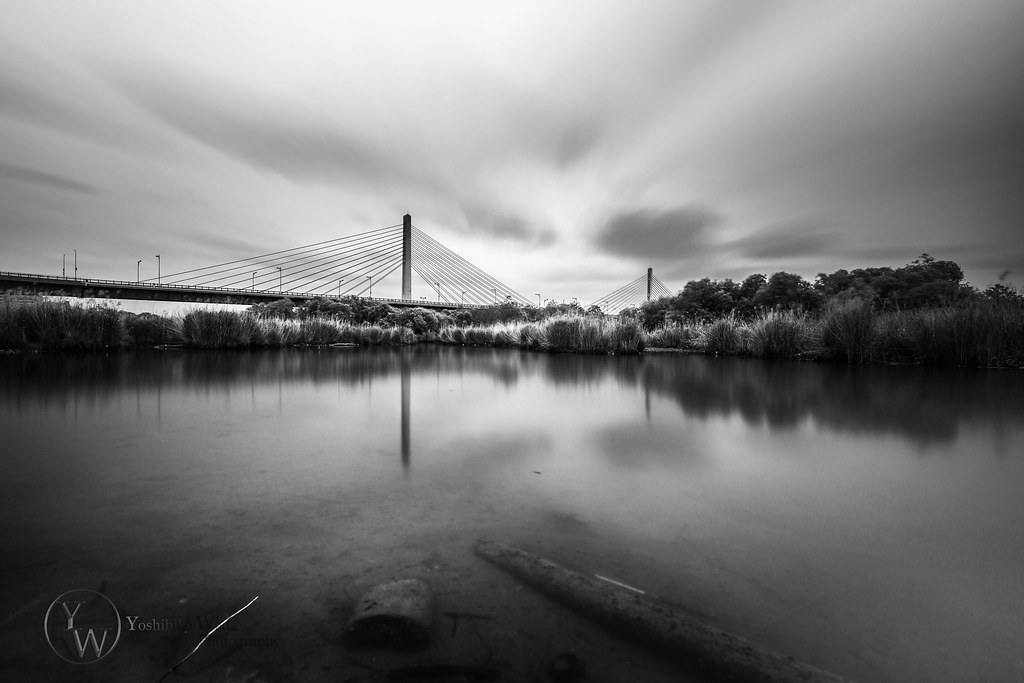
The name of the bridge is Sugawarajyo-Kita-Ohashi in Osaka and is located in the northern area of Yodogawa-river. This was not a sightseeing spot, nor a popular bridge, but I had noticed the unique shape of the bridge, and wanted to capture it for a long time.
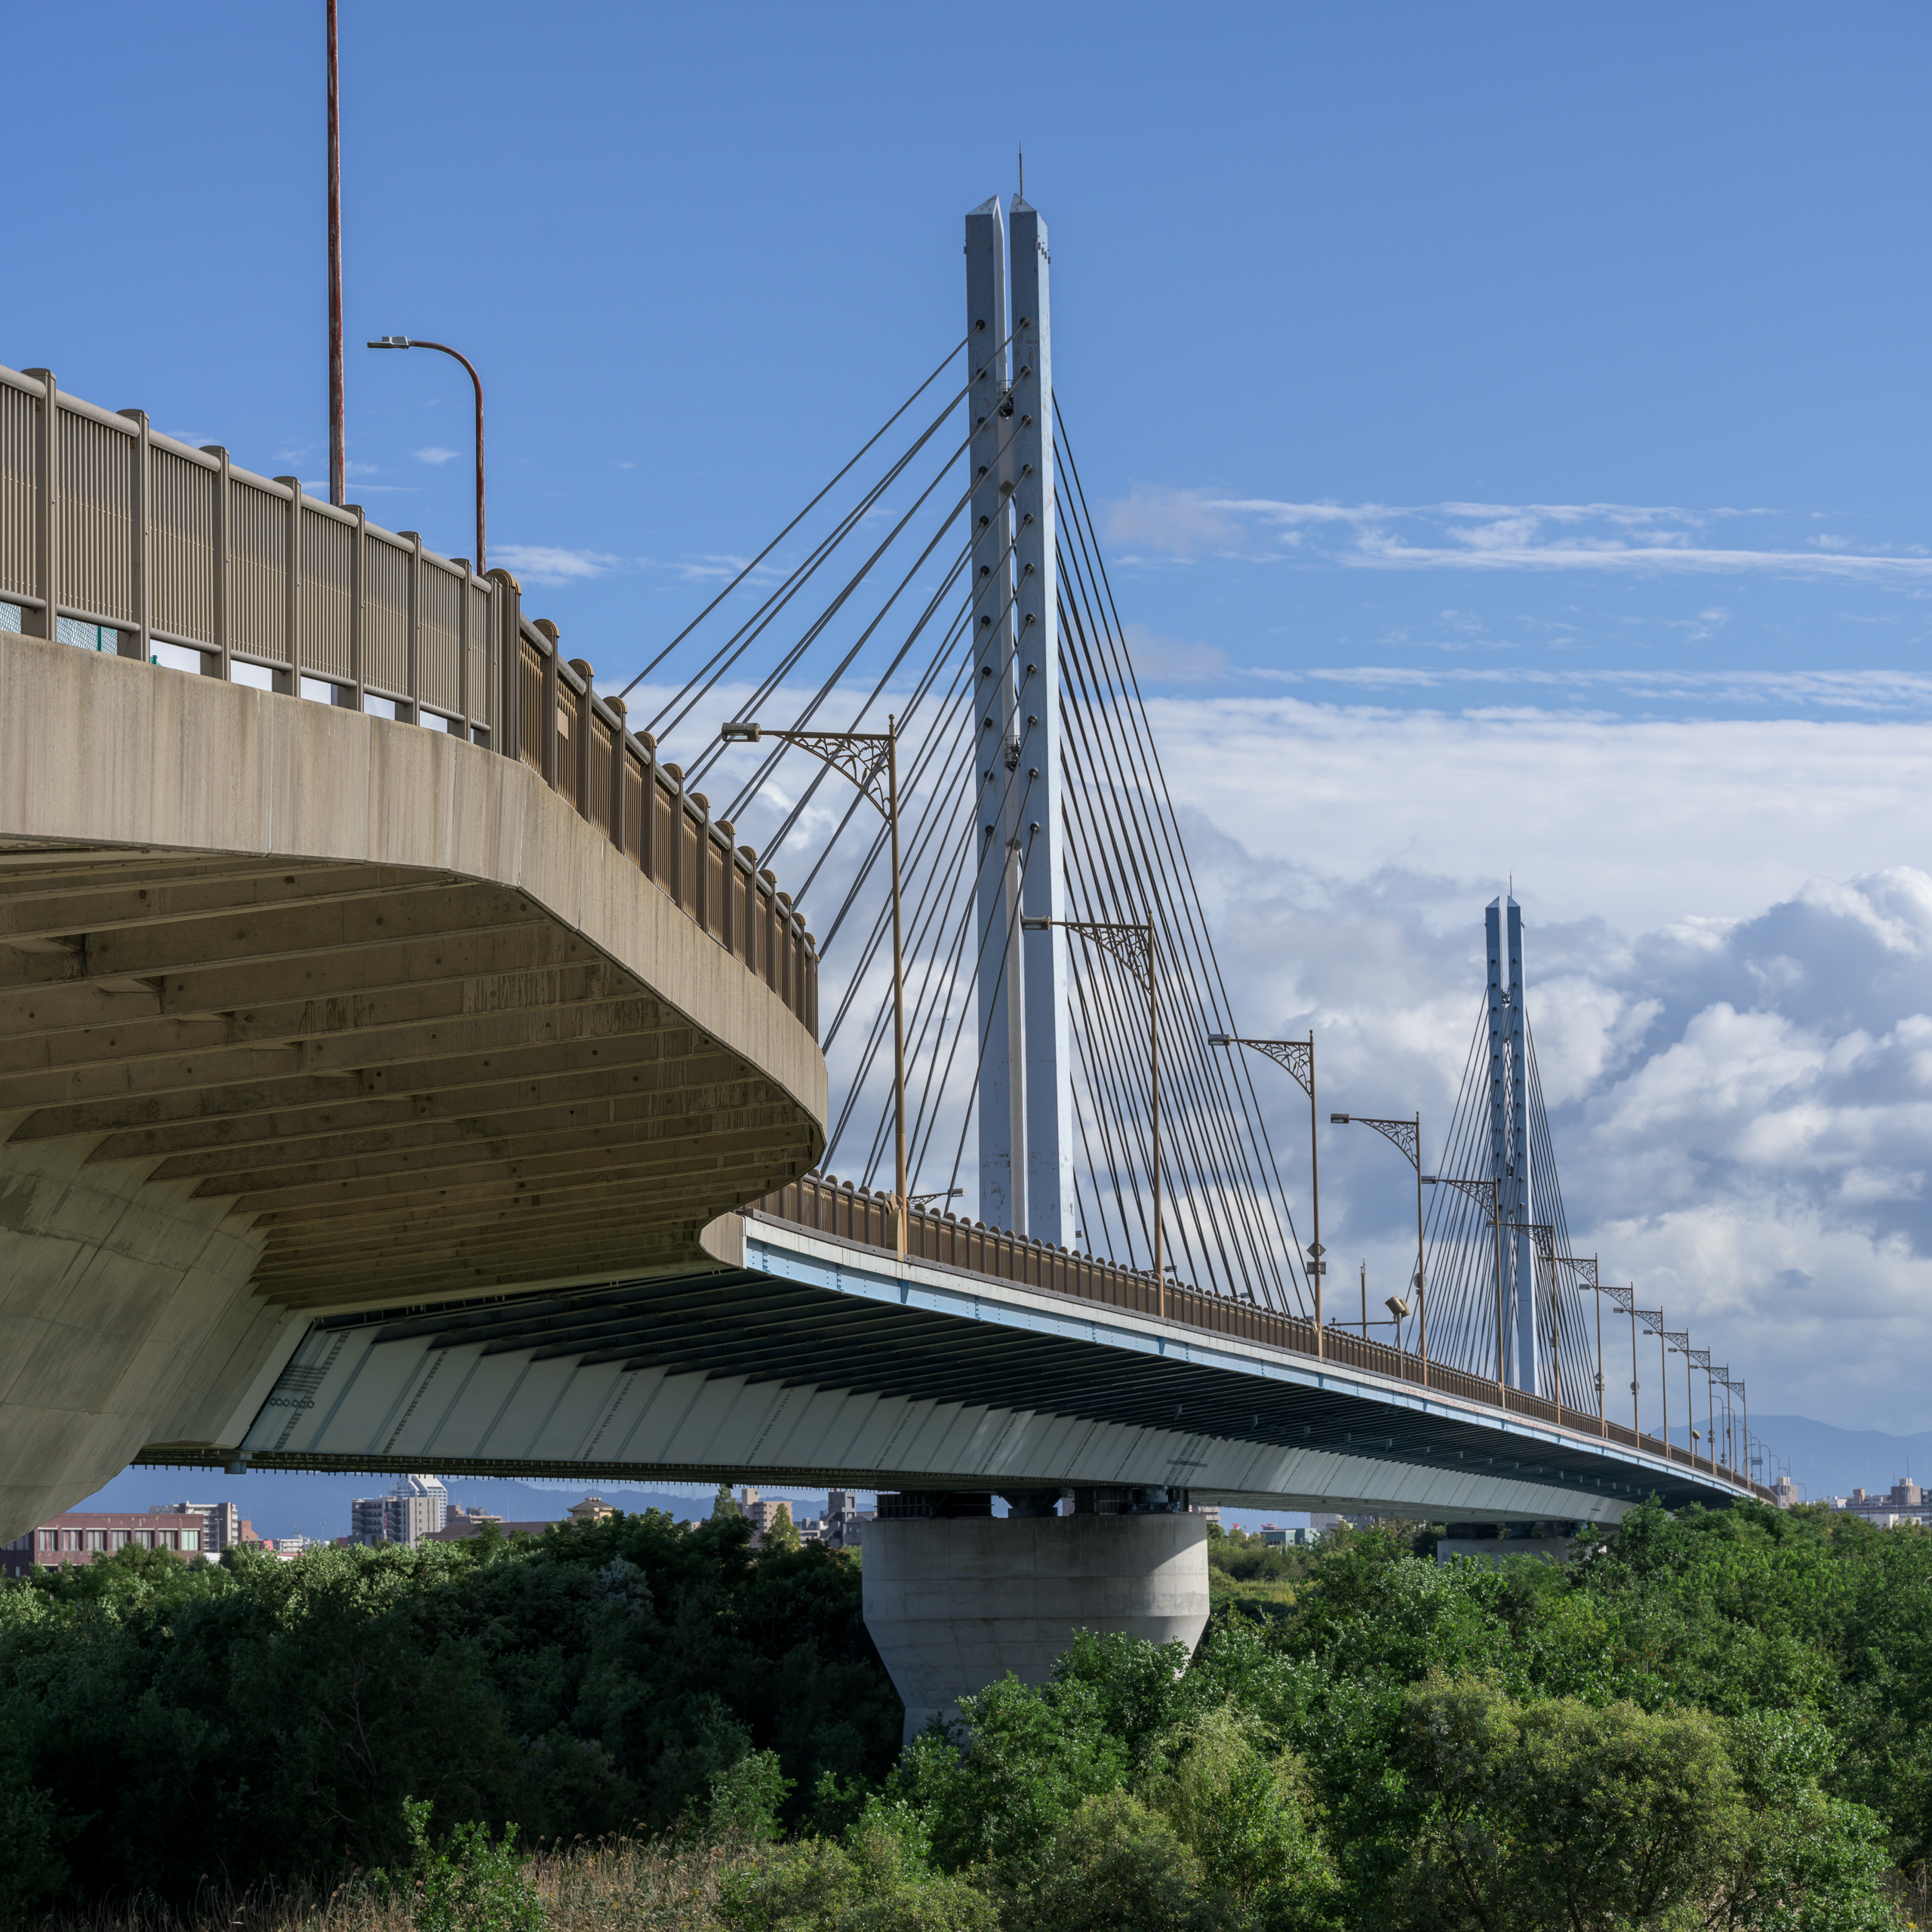
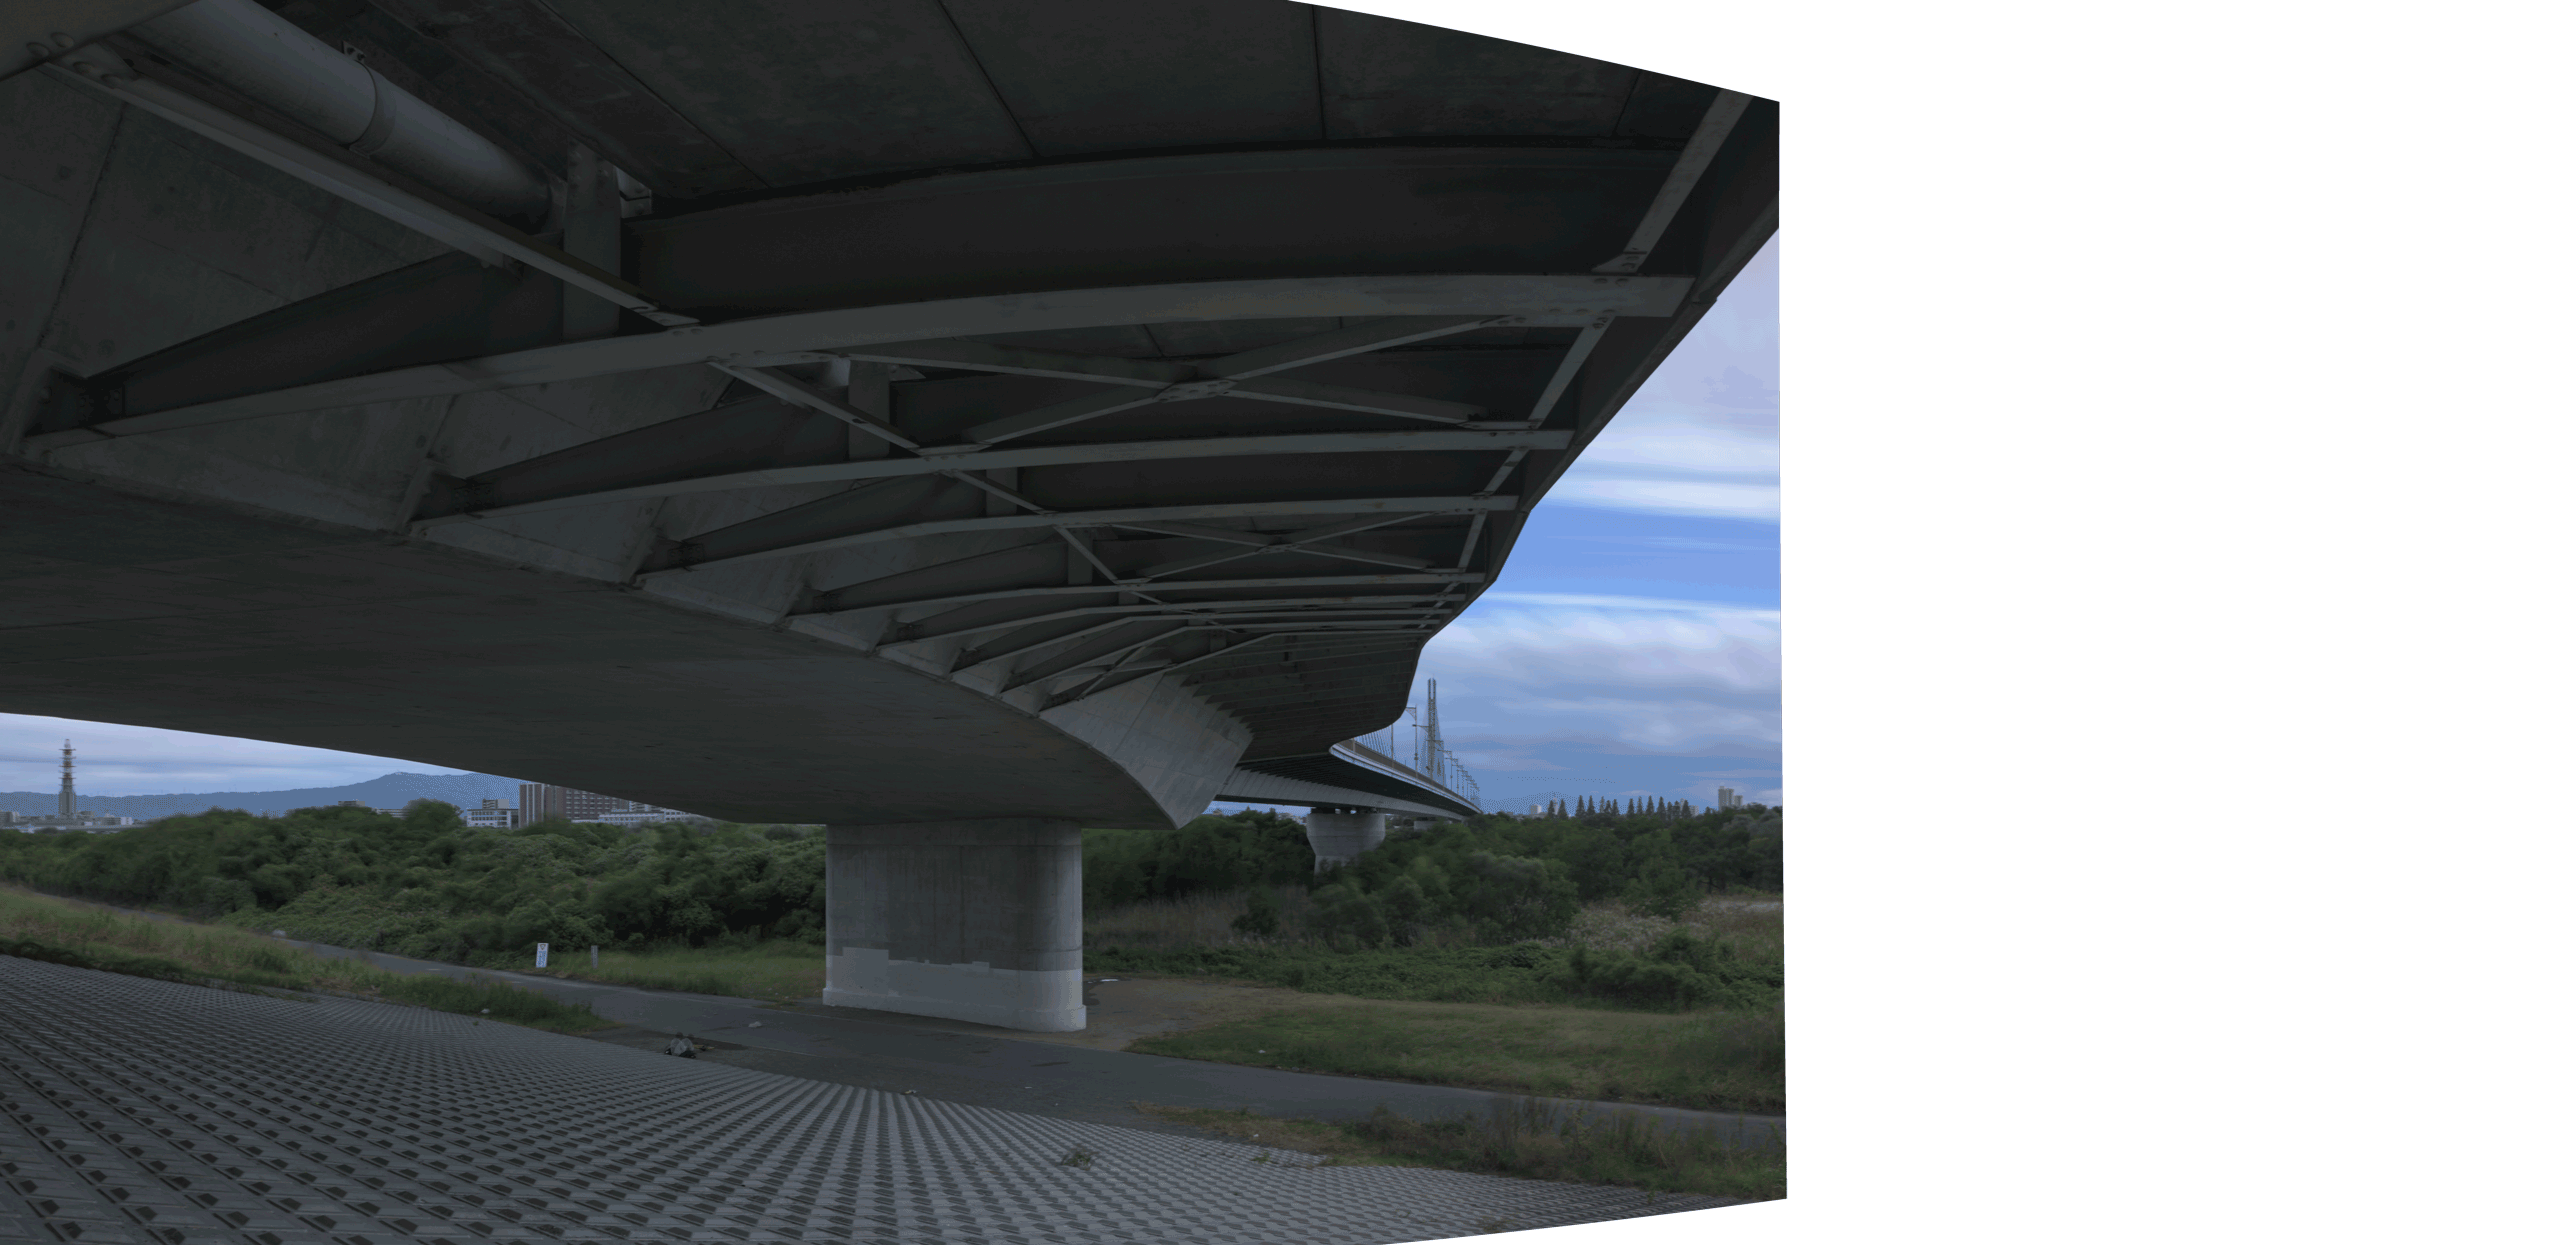
360 panorama captured by [ Z7+z14-24 f2.8s]
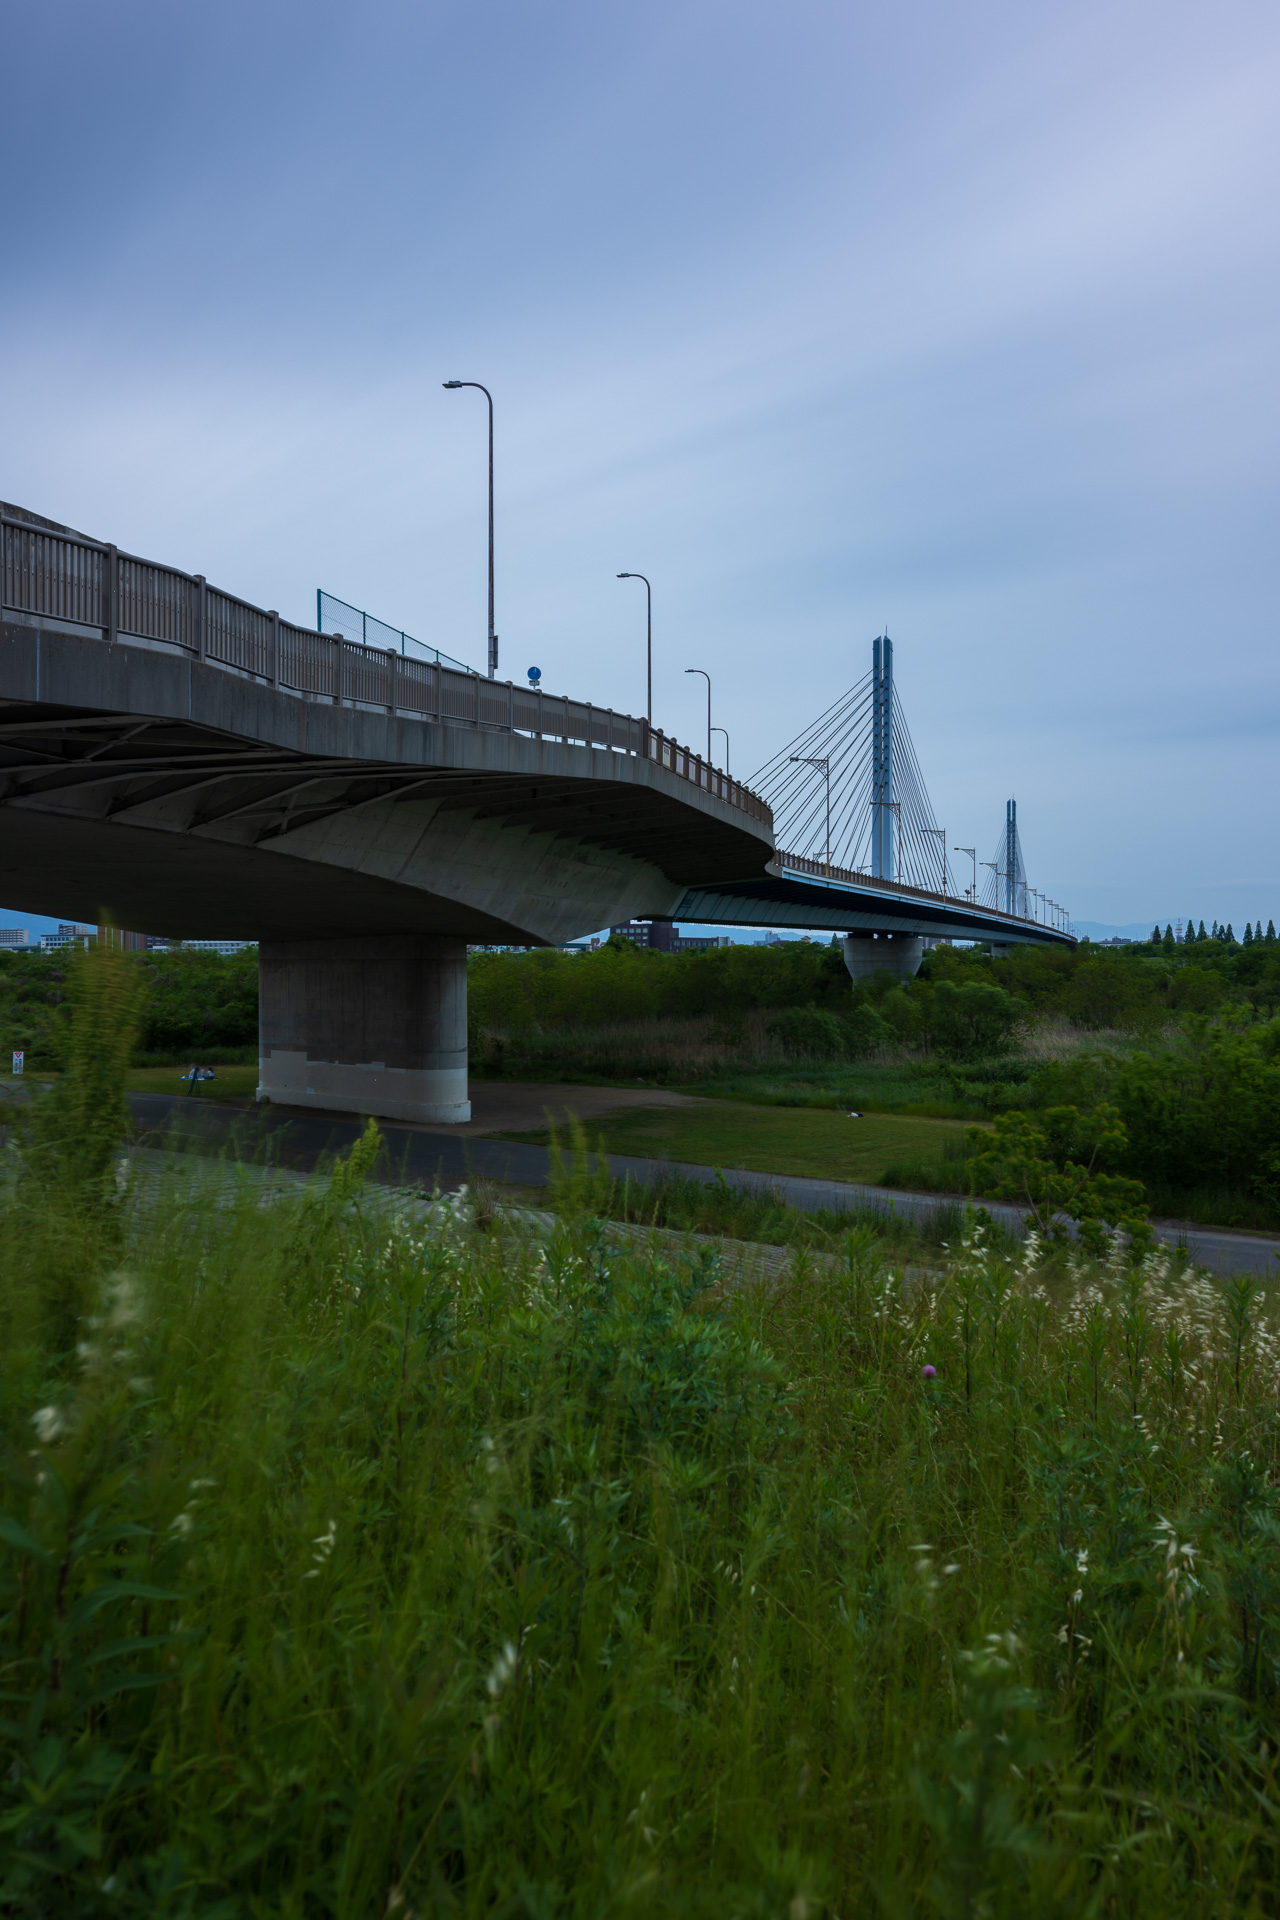
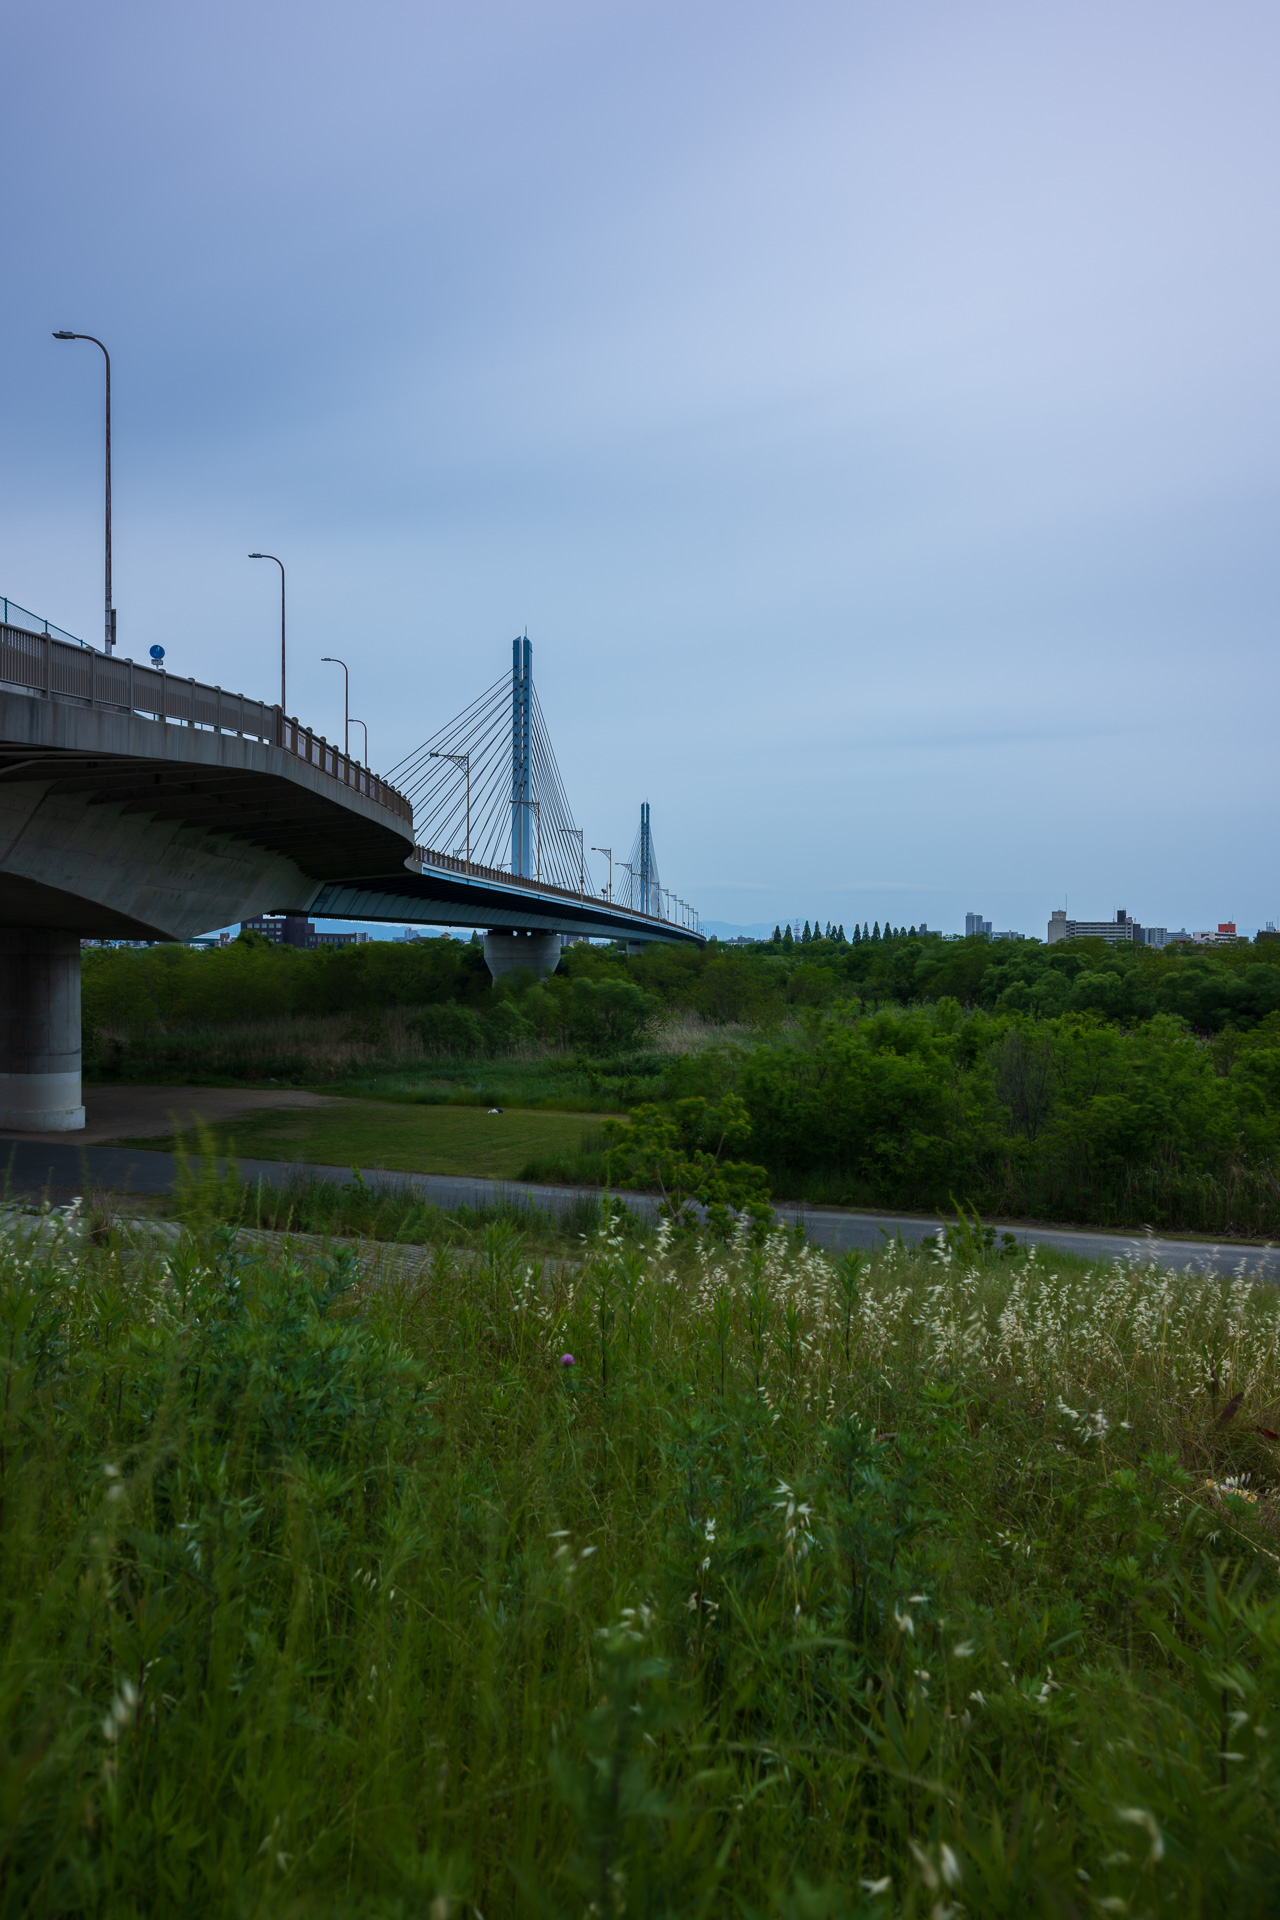
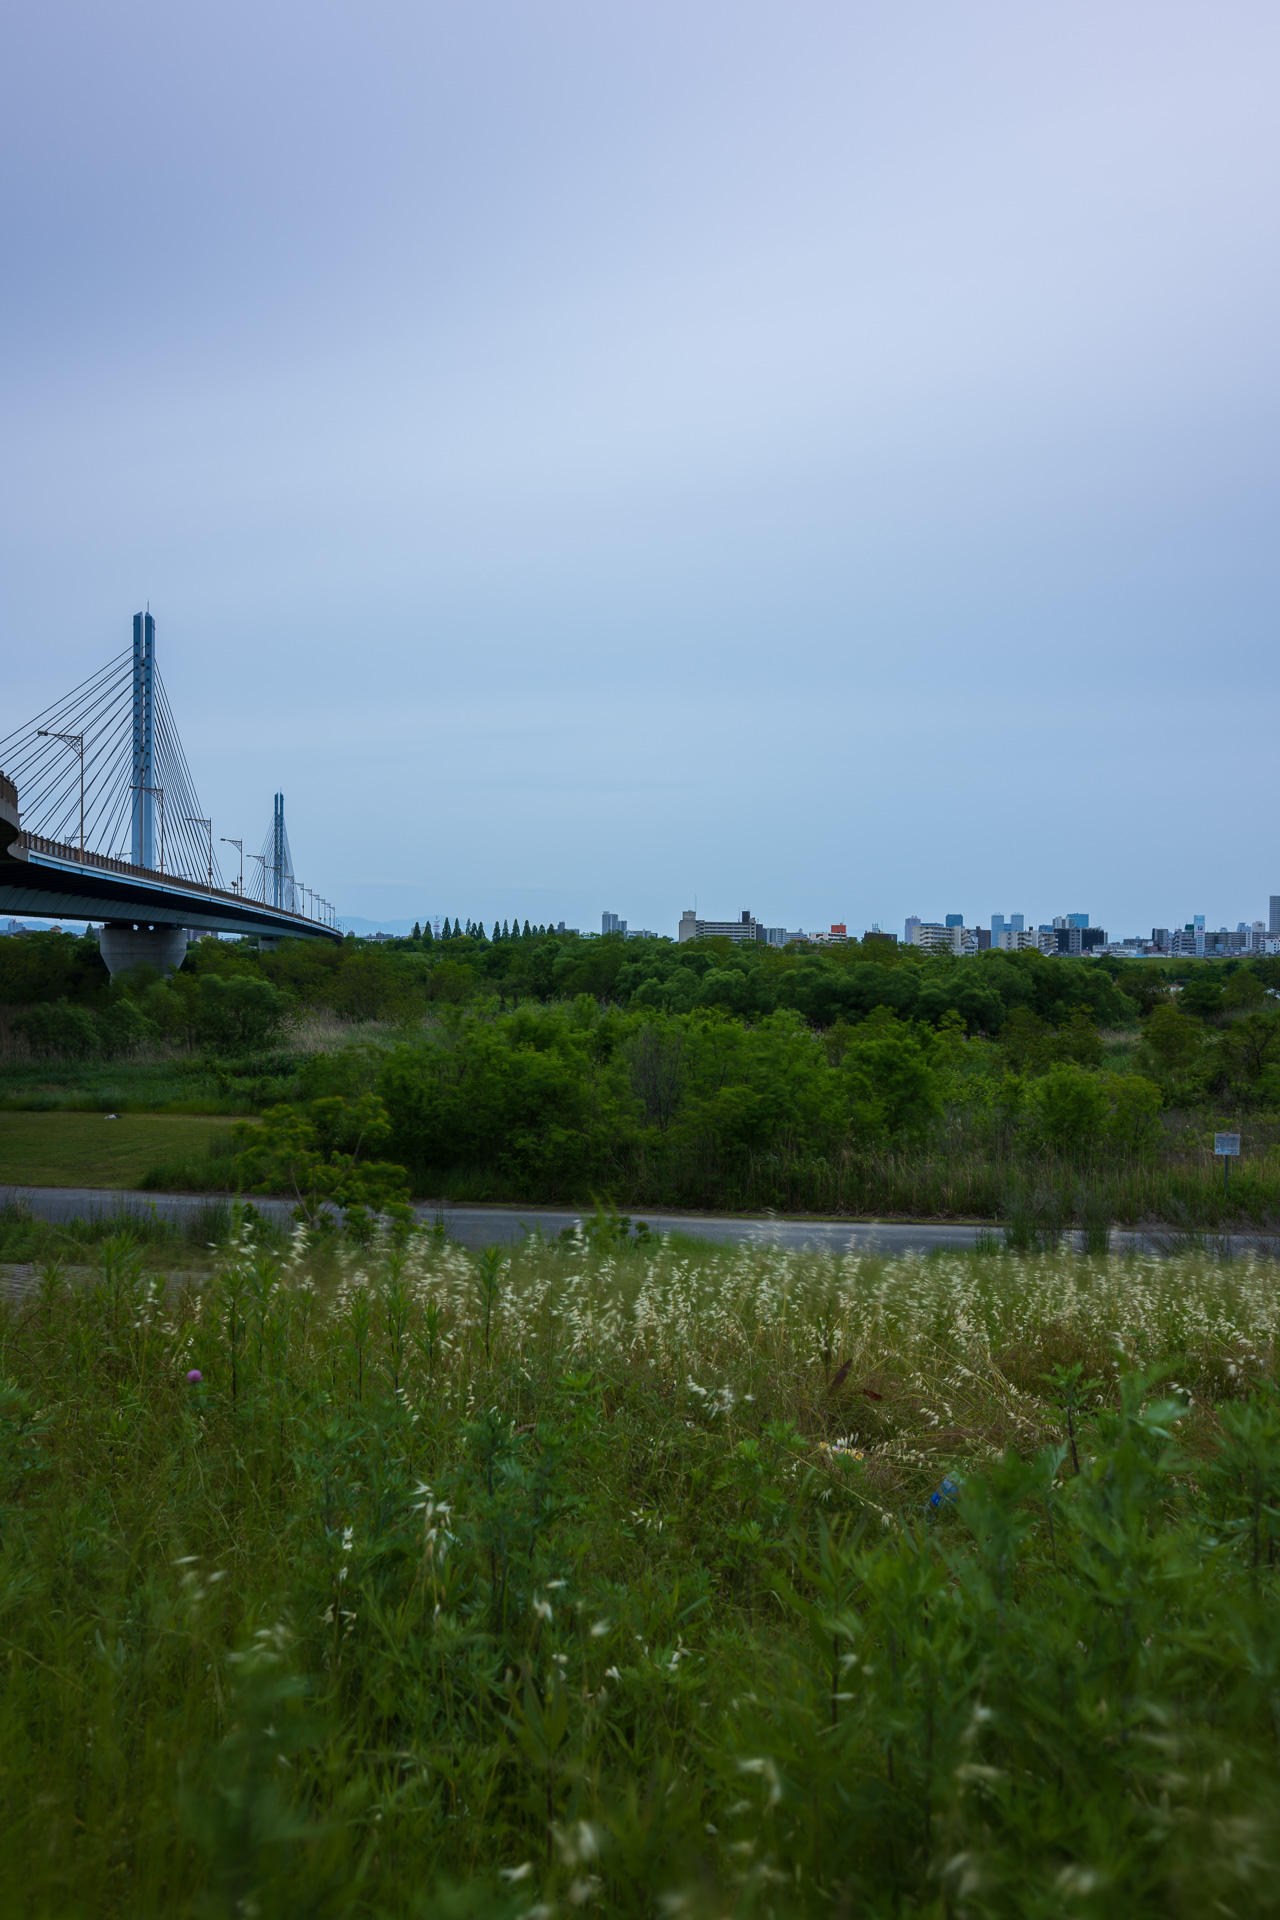
I sometimes capture a 360 panorama with an ultra-wide angle lens.
It shows the atmosphere so clearly, and it is just fun to see 360 virtual views.
It is really easy to capture and make a 360 panorama.
I’ll blog about dedicated 360 panoramas in sometime future.
Close up
There were full of bushes near the bank. I could not close enough to the bridge, so I gave up to include the water’s surface. This image was taken by z105mm micro. (vertical 2 images was stitched to square) It might be interesting for making a wider image with the same lens. I’ll try it in the future.
Data
Shooting date: 10/17/2021, time 13:30-14:30
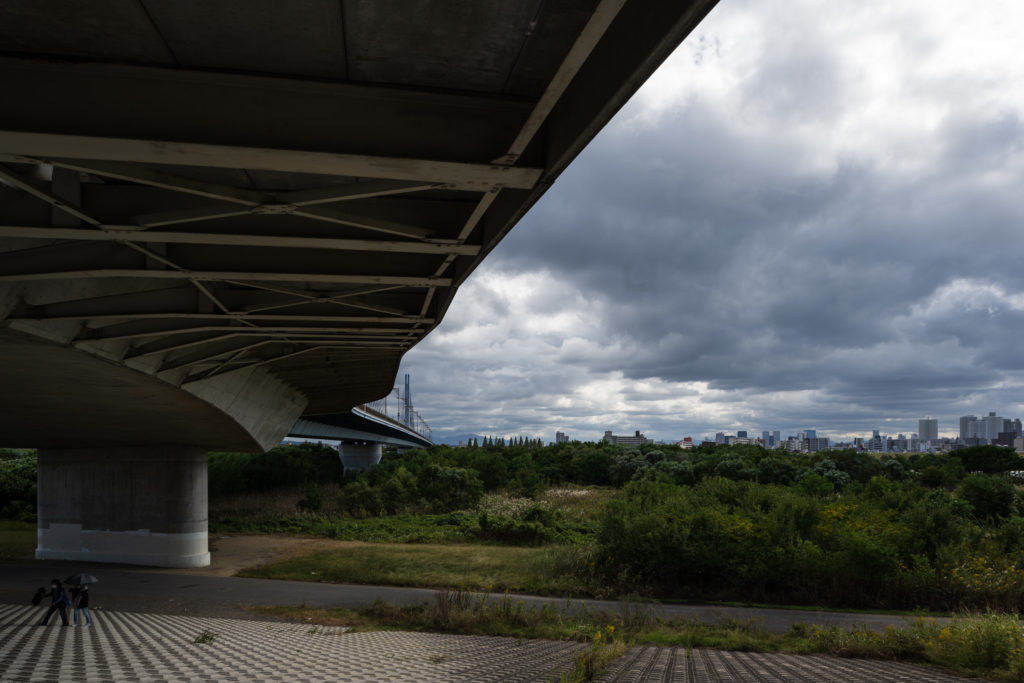
It was a sunny, a bit windy day. Suddenly the dark clouds were coming from the north and covered the sky. The rain started then I went to the under the bridge to shleter from the rain.
I found that I could shoot from under the bridge while raining. So the composition I found was pretty much a coincident. The rain and the thick clouds lasted around 15minutes. So I was pretty lucky for chaching the moment.
Idea behind the image
My lifetime favorite subject is “bridges”. I’ve already made three series of briges:The land of connctons, The city of juncture, and the latest one was: The Under lines.
I am still thinknig whether this image beleong to: The land of connections or The Under lines.
spin off?
The most notable differens of This images was no flat water in the image.
Initially I planned for adding the flat water in the image as usual, but I coud not reach the bank: too mudy and full of bush. It was giometially impossible.
May be this image spin-off from the LTC.
The image from the first visit

This image was from the first visit. The first time was a kind of test shooting that I did not use my favorite lens pc-e 24mm. I was there with z14-30 and z24-70 for the test shooting.
Data:
05/11/2021/ 15:30
Camera:Z7
Lens:z14-30(24mm) F4s
Panorama: 4 vertical images (the image was cropped upper and bottom area for 16×10 )
I was not satisfied
fully with the composition. Moreover I did not like the character of the lens and the rendering.
Afterall Z14-30 is the ultra wideangle, and never be competed with a prime 24mm.
Anyway, this was the rehearsal. I abandoned the image as a test shot. And never be showed until now.
Z7, z14-30 f4s/274sec, f7.1/iso 64
Color version with Panorama stiching image
The image was a 2 horizontal images of panorama. Here is the color version before the BW edit.
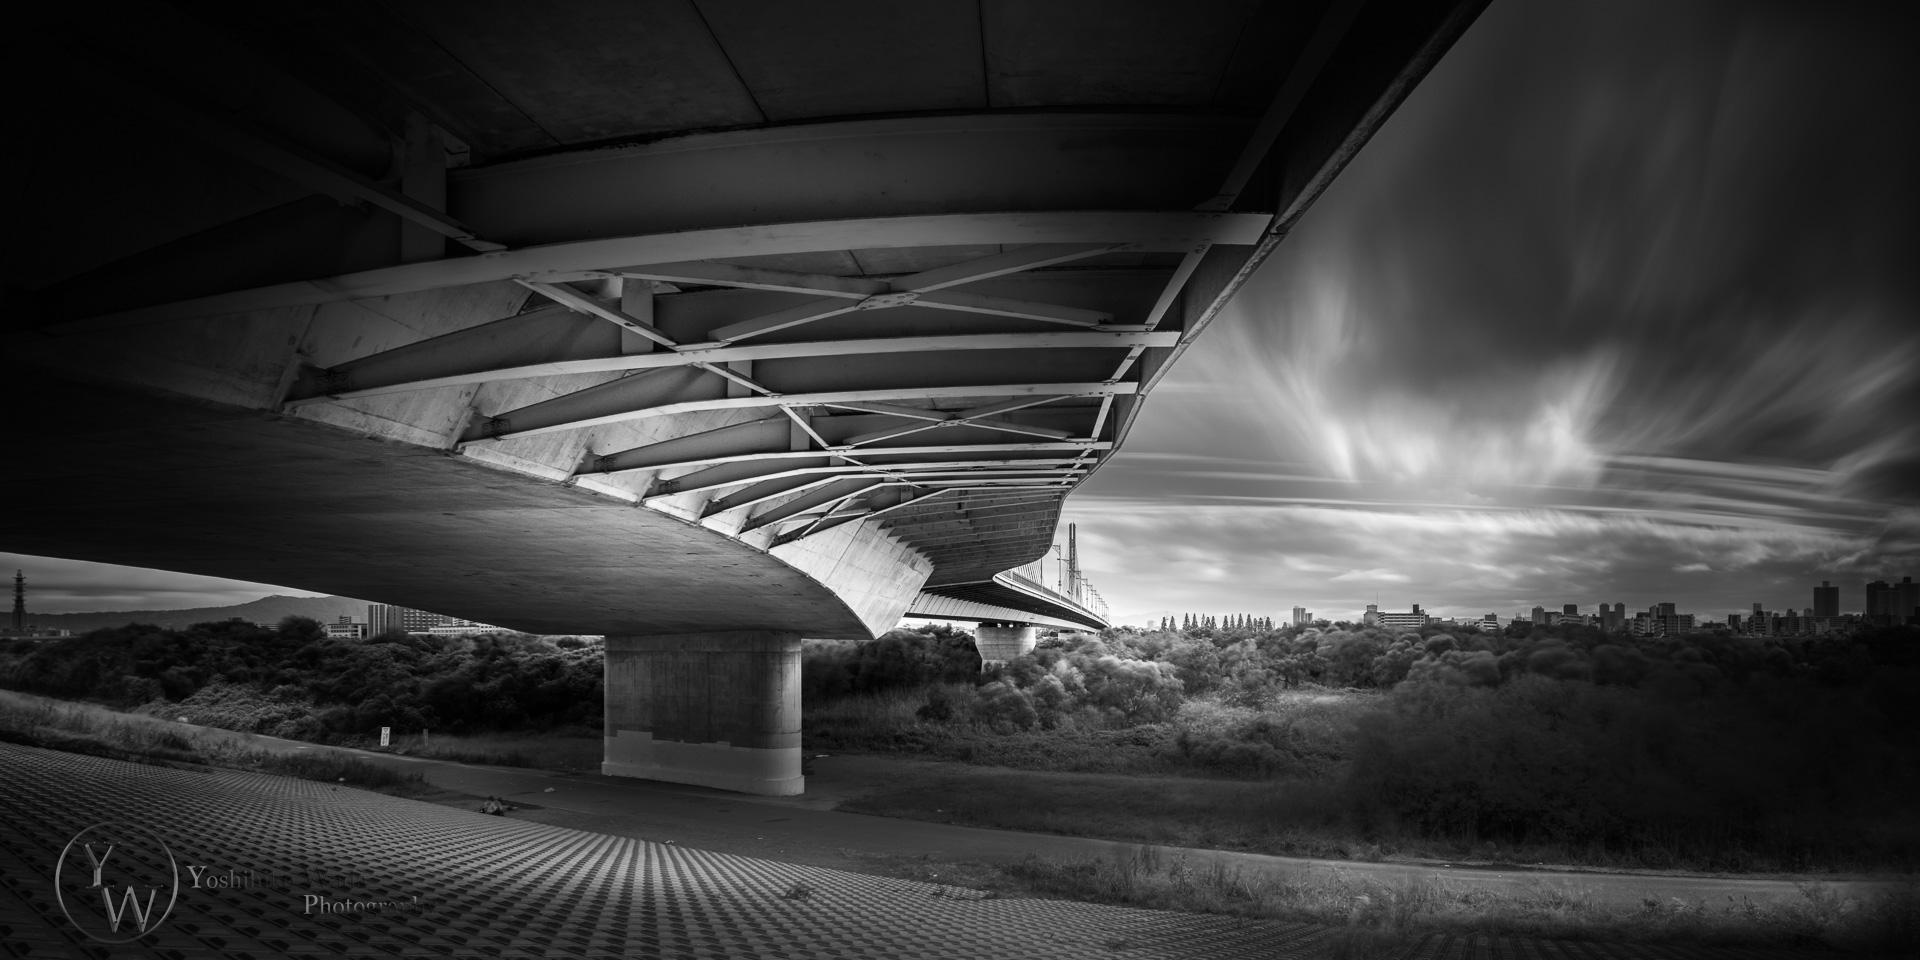
Gear and Tech info
Camera: Nikon Z7
Lens: Nikon PC-E 24mm (FTZ mount adapter attached)
Tech info. 180secnds. F8, iso64
ND filter: Formatt-Hitech/15stops(13stops + 2stops ) Firecrest Ultra Sqaure filter (100mm)
Panorama head and Rail: Nodal Ninja6
Ball head Markins Q10
Tripod: Gitzo GT3543
Image description
I set my panorama rotator for 30°, and shot 4 horizontal images for panorama.
Althoug I just used only two of them.
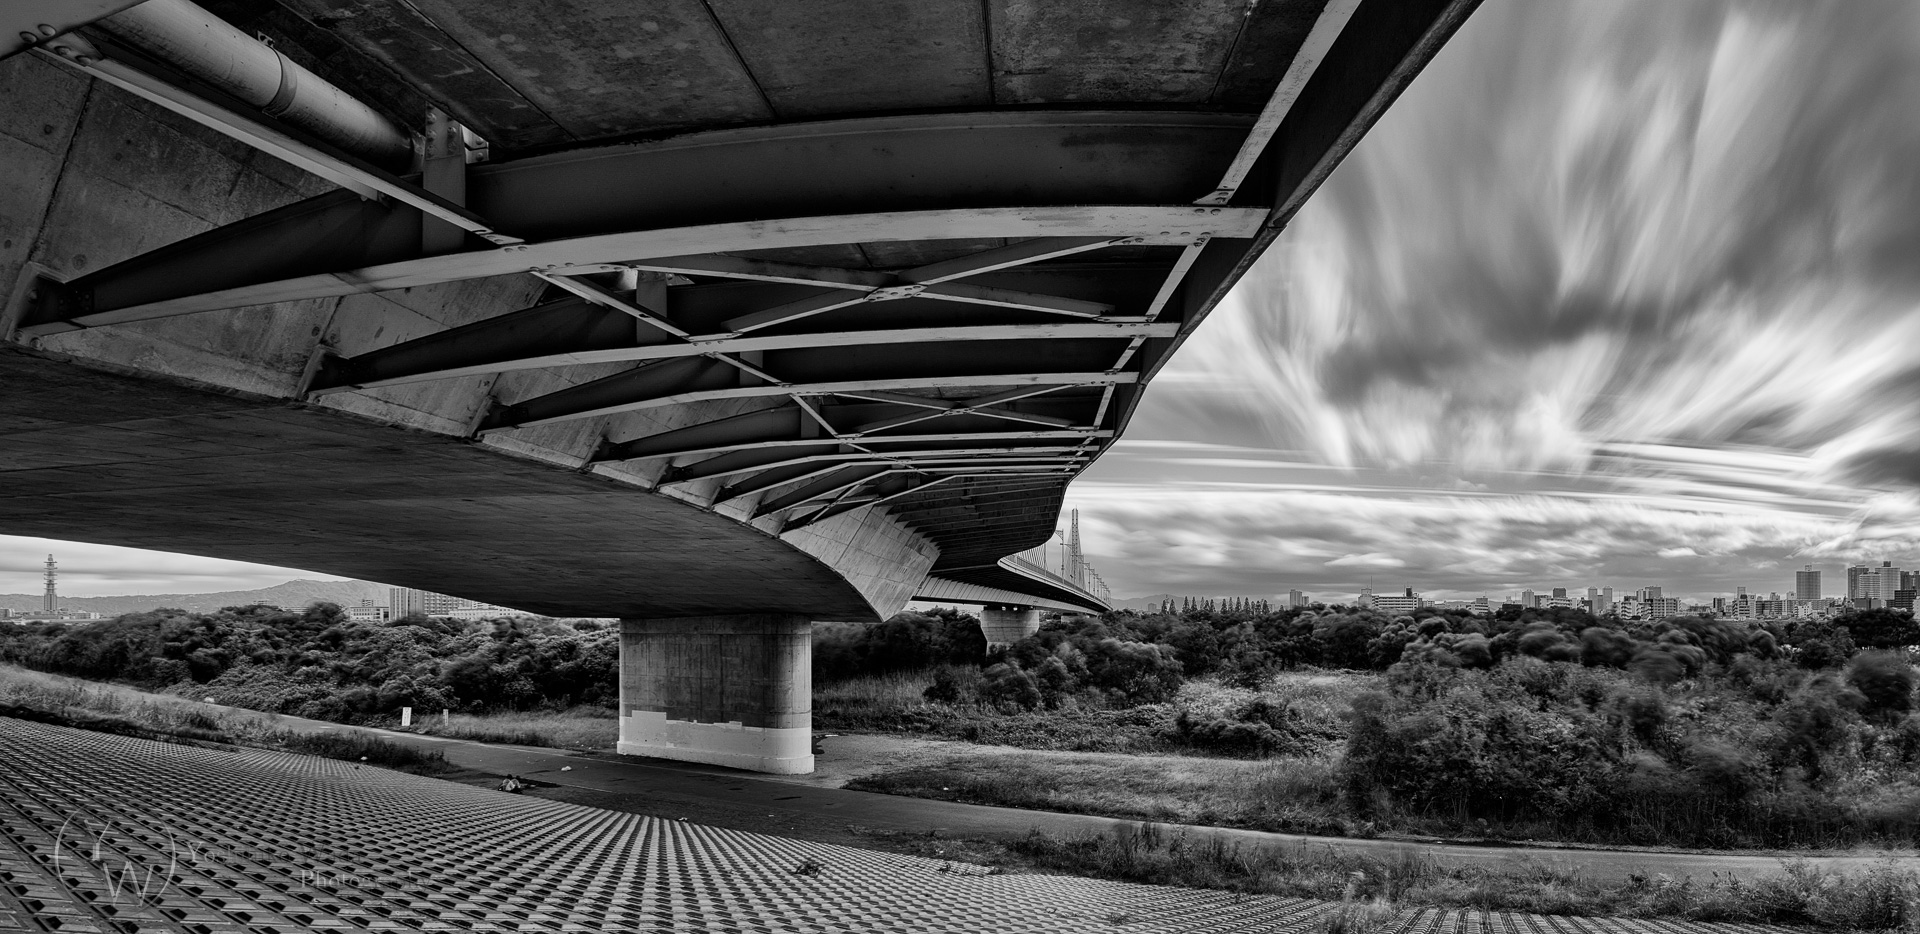
The wider panorama version
This was full 4 image-stiched bigger panorama. I though it was so wide, and the shorter version was much compelling and give much impact to viewers.
Drafts
The first step in my BW workflow I always to make a rough image in Lightroom.
I made many local adjustments. The latest version of Lightroom has mucu more precise selecction, so sometime it made me feel ” Should I do postprocess in Photoshop?”
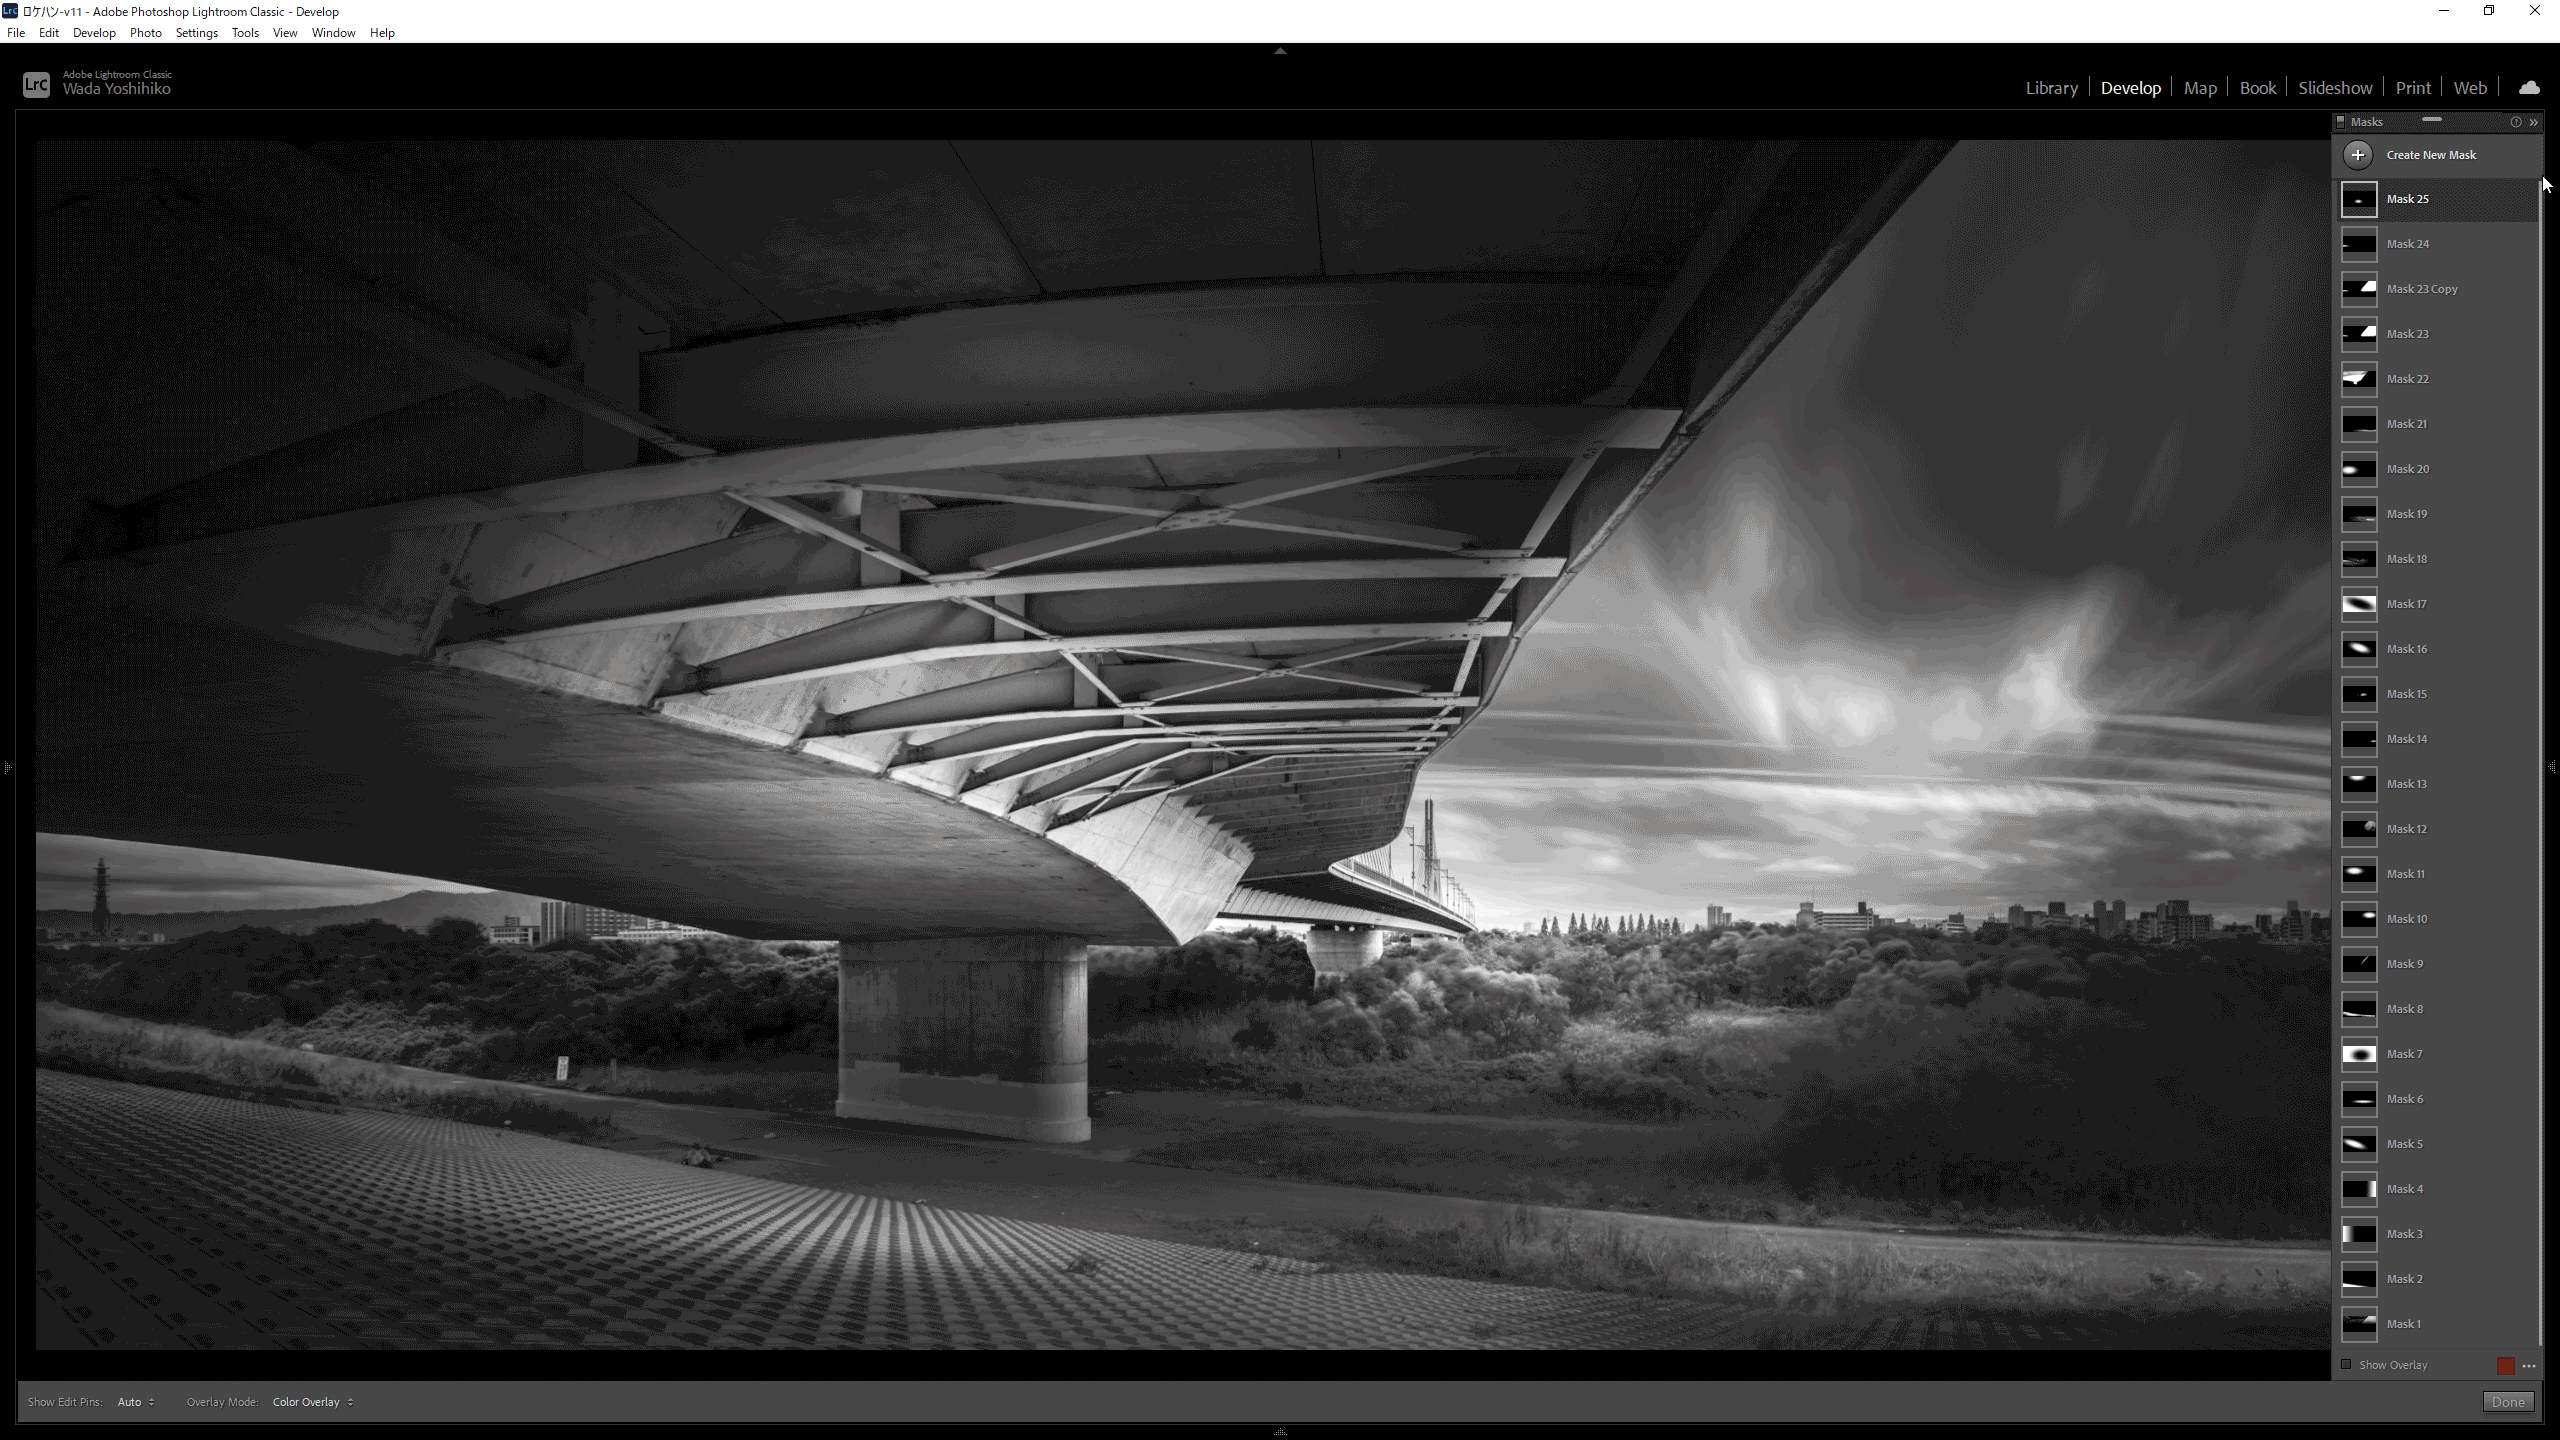
BW Layers for Postprocess
When the rough image looks compelling, I start to make some BW layers for post-process in Photoshop. This time I added the detail layers made by Silver Efex Pro.

Silver Efex Pro [DXO Nik collection]
The plugin was my favorite, but I had not used it for a while, because it was not compatible with 16bit, until version 4 was released by DXO. Now the Nik collection is fully supported by 16 bit, and it is back to my favorite plugin again.
I used it mainley for the detail enhancer, which cant be achevei wtih “calrity” in Lightroom.

Comaprison Rough and Finished image
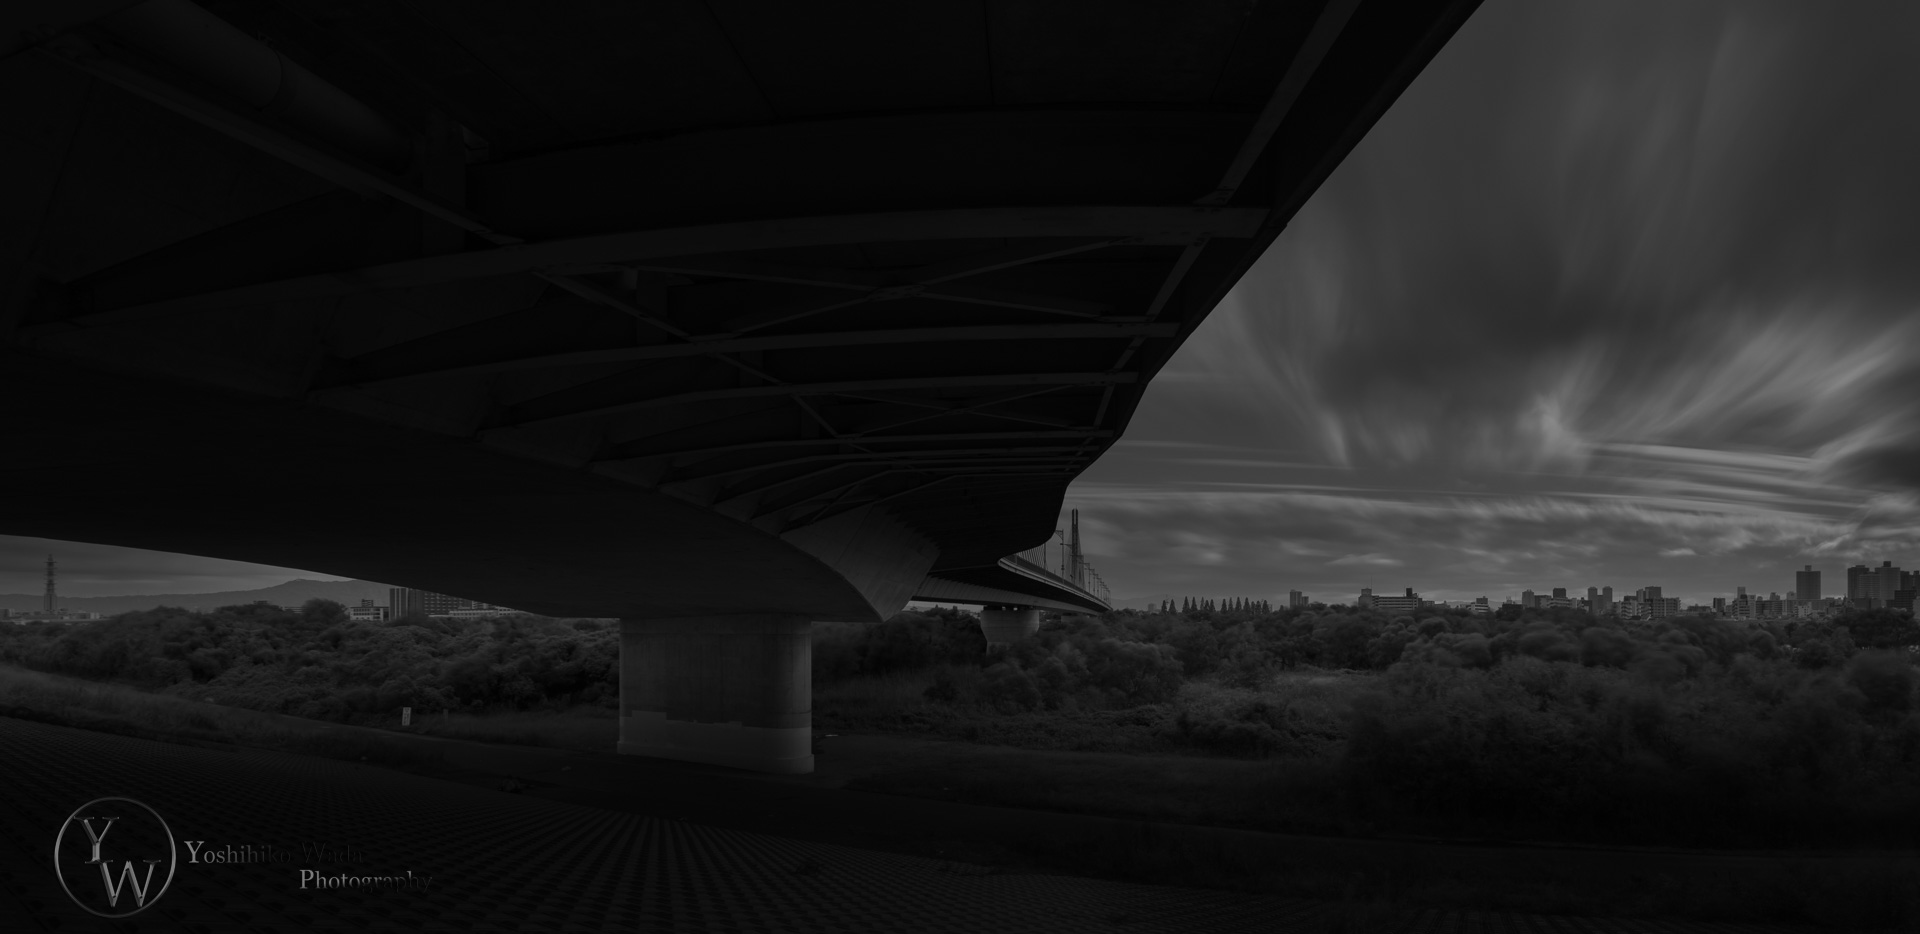
Lastly, let’s compare the rough image in Lightroom and the finished image with photoshop editing.
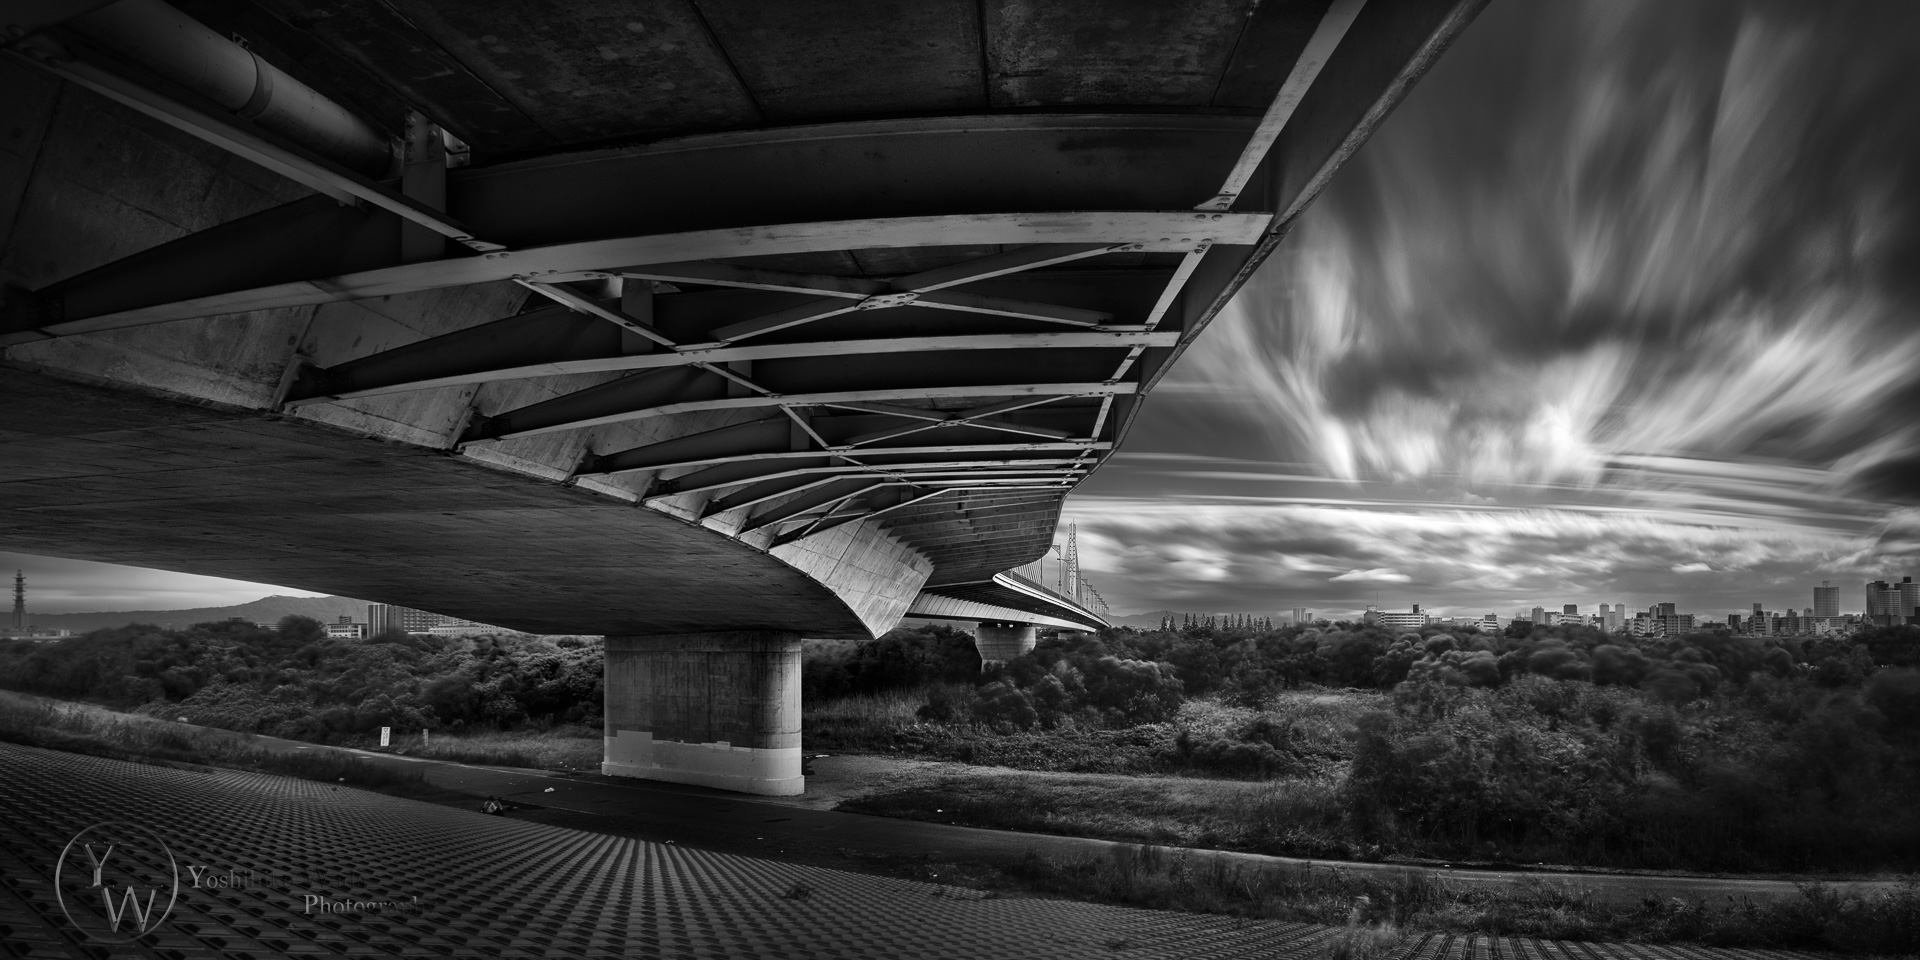
Which do you like? The finished image was more enhanced the detail with more precision and had fewer vignettes than the rough one.
You might know why I call it a “Rough image” by seeing both images.
Another image from the bridge
While searching for the best composition of the bridge(on my first visit), I shot several long exposures and this is one of them.
Final thoughts
Go the same location at least twice
There are no same condition out there.
No one foecast of the weather compeltelly.
Be there
You never know what will happne in the real world.
No matter how the usufeul app is in your phone, data is just a data.
Just grab a your favorite lens, go outside.
Don’t forget a tripod and 16stops ND filter.


Comment